Cake from boxes with a surprise with your own hands. How to make a paper cake with your own hands: master classes
Paper cake made with your own hands - one of the most pleasant birthday gifts for your favorite squeak friends, which can be done independently, if you show a little fantasy.
Cake from paper - beautiful and original!
I would like to note that the selection of the material and gluing all together turned out to be at least a positive activity than the enthusiastic reaction of the birthday man and guests on the holiday!) There may be a reason to be another, and for the desire to embody such beauty in reality, it did not get up. As it was, I'll teach.
All we need:
Box for cake
The box for the cake, purchased in the famous store of your city, will retain the intrigue until the opening of the gift. Because everyone, including the birthday girl, will sure that in the box a regular cake from the store. Choosing a box, keep in mind that the size of the useful area inside the base should be at least 200 * 200 mm. IN otherwise You will have to change the dimensions of the layout at your discretion.
Paper cake layout
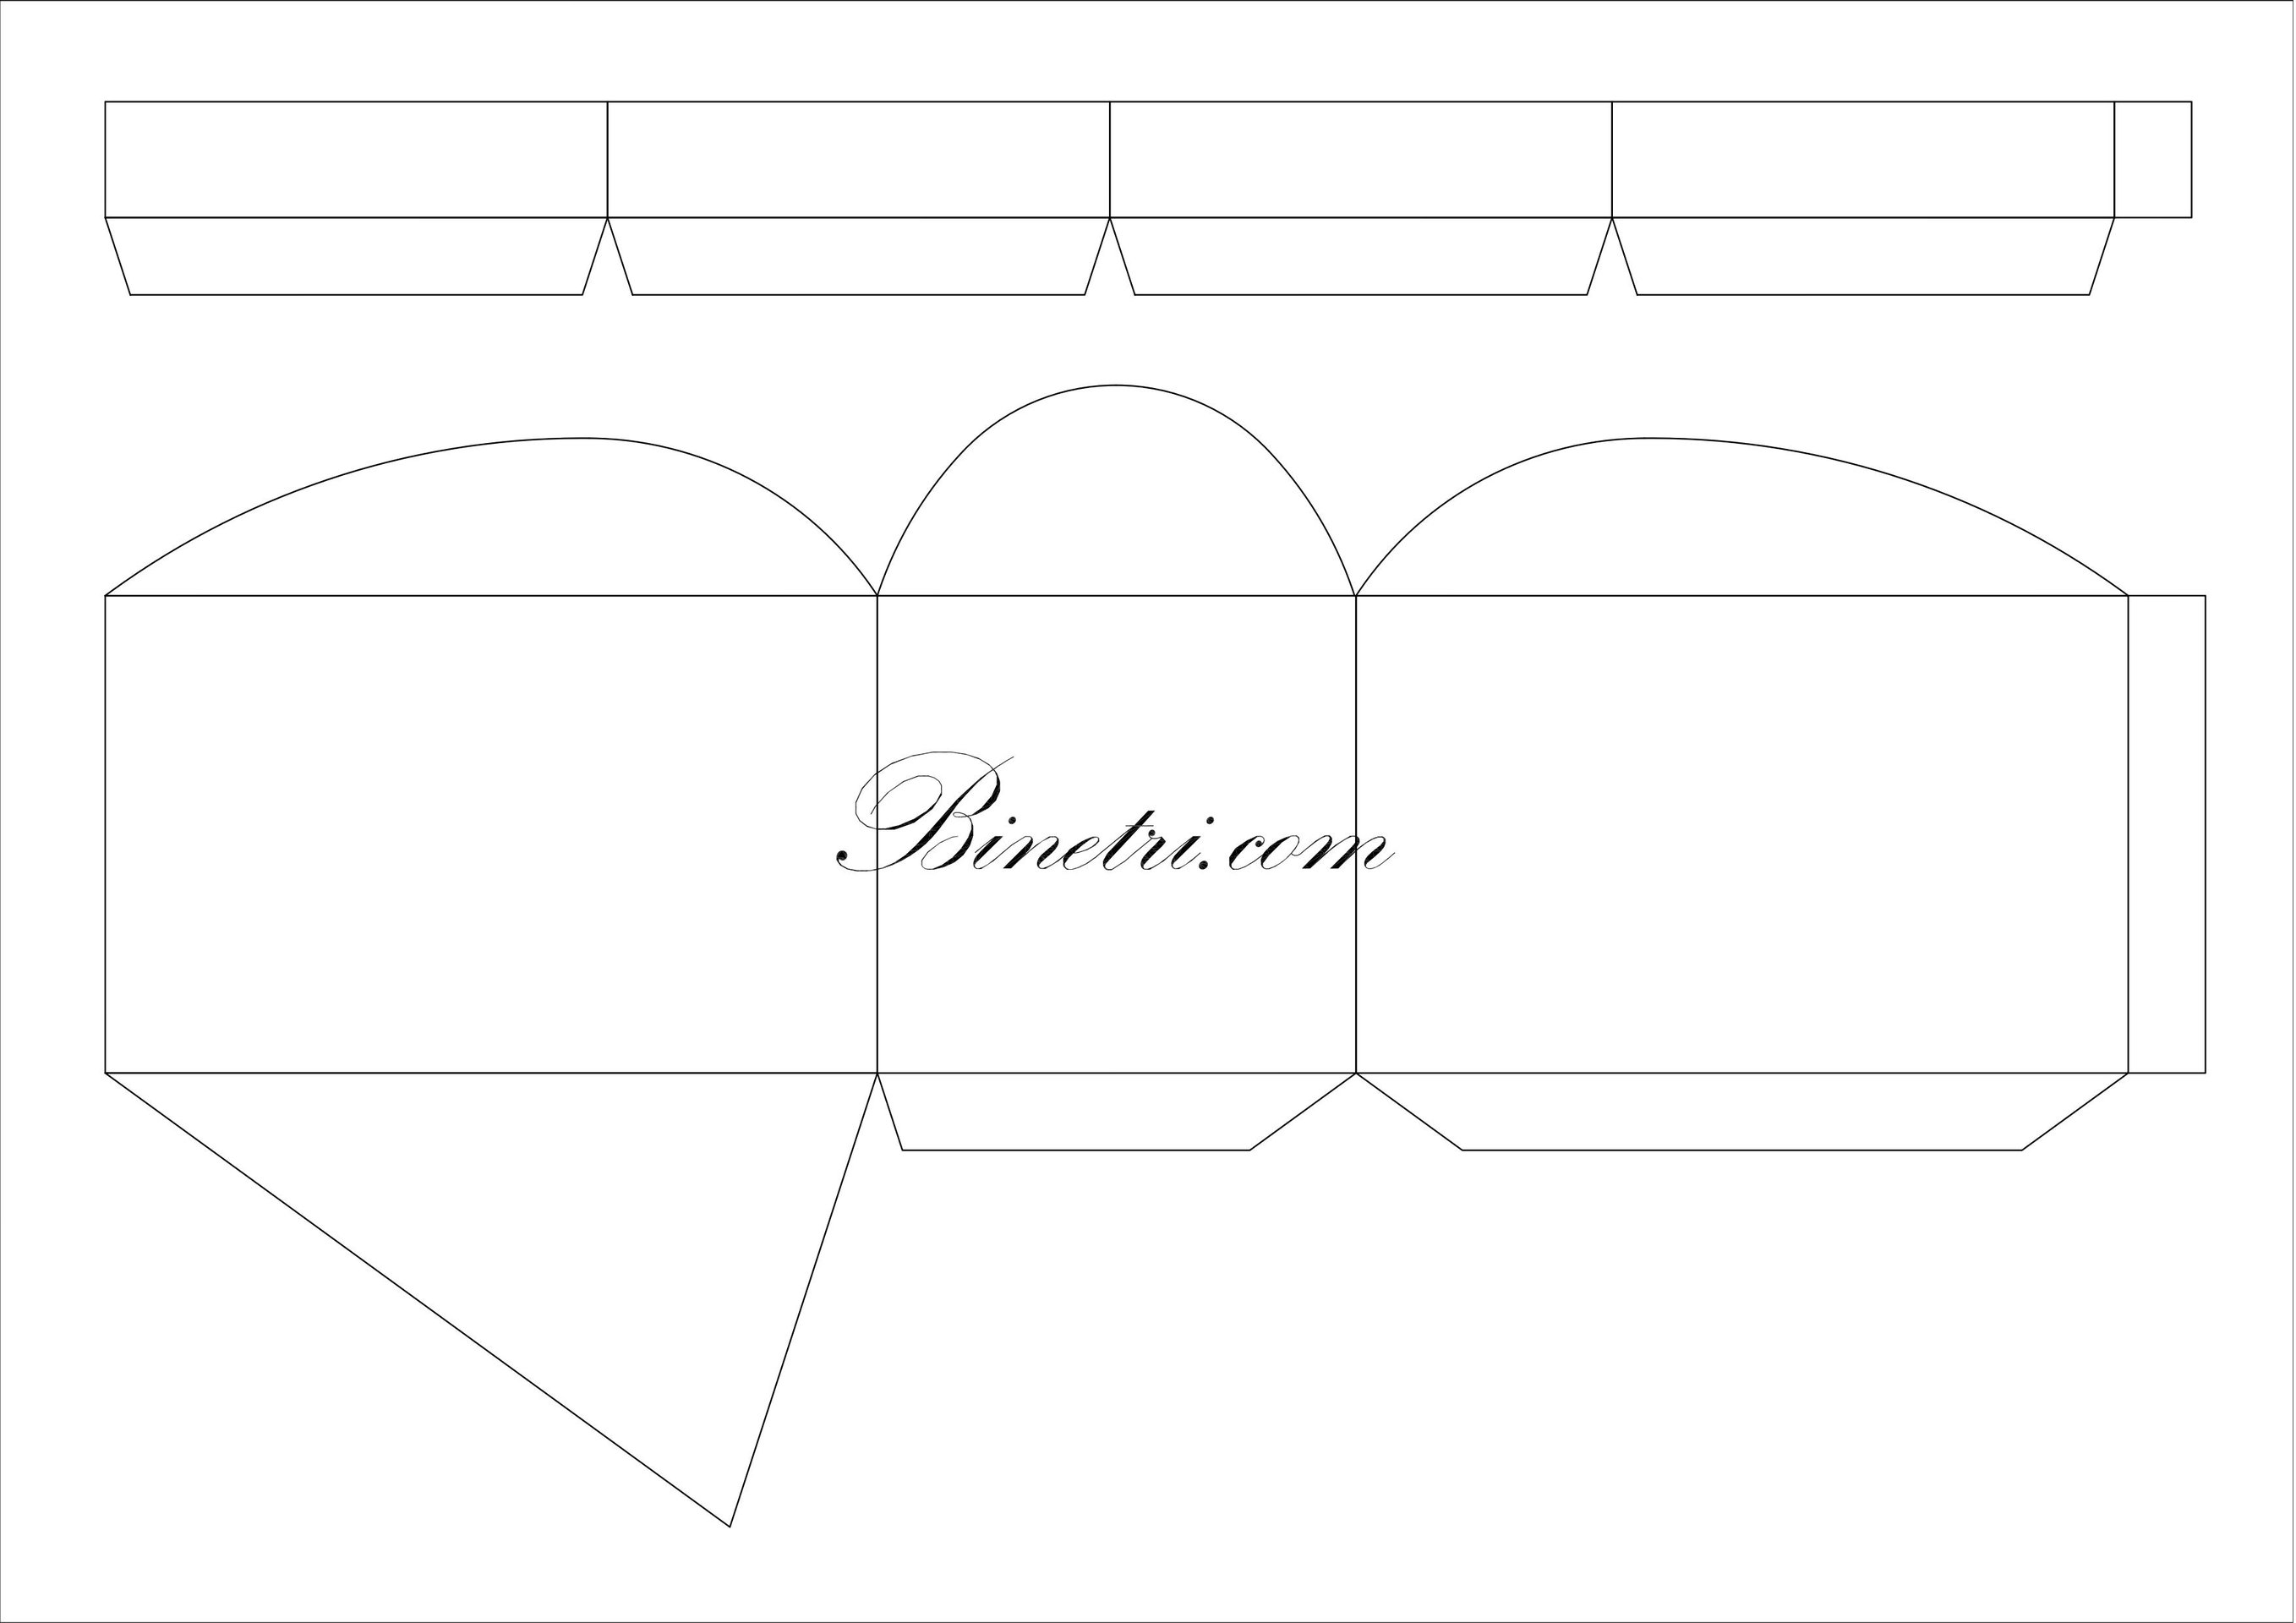


The calculation of the layout is, of course, painstaking and not fast. But we already did it and with pleasure we share them with you. You need to print it on ordinary A4 paper. When printing in the settings, be sure to select "Real Size" Or remove the checkbox in the point "By page size" Depending on which program you will print. It is necessary that the proportions of parts are properly preserved.


The first sheet with a mock-up piece we were printed in two copies to work out in its gluing. We advise you to try. We got like this:

Cut and collect
In the layout of the details on the sheets of cardboard instead of 10 parts of pieces we made 11 especially in order to shop and select flowers, ribbons and bows with this excess box. Glue the boxes glue PVA - in no case use the "moment", because His unpleasant smell will remain for a long time.


Decorating pieces of cake
Walking on hobbies markets and sewing stores with an "excess box" and deciding with the choice of floweries, satin ribbon And the bows can be attached to gluing the latter with the help of a thermal system. Flowers we decided not to glue, but leave this thing to the easiest thing, so as not to blur them.


Tasks and preparation of grounds
Our paper cake is almost ready, but we decided that it would be not interesting enough to fill it with different delicious candies. So came the idea to turn this wonderful gift in cheerful game And put in each piece of leaflets with tasks from craft paper. To do this, we flashed 10 rectangles with a size of 10 * 7 cm and wrote different tasks on them, which belong to the perpetrator of the celebration. Then the sheet was cut into separate rectangles and twisted into the tube. We had tasks for each of those present:
- Tell a poem on a stool
- Sing a song birthday
- Fall as a birthplace compliments
- Stans with birthday
- Kiss birthdaynitsa
- Express thanks to birthday
- Confess love birthday
- Feed with a spoonful birthday
- Selfie under the table with birthday
- Perform the wishes of the birthday
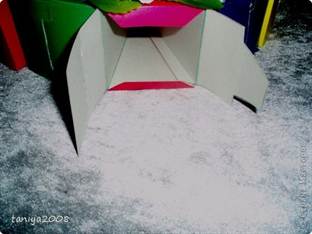
The base of the box from the store In our case, it was simply gray-white, on this chocolate cake looked at it in any way and the more did not have the effect of "Wow!" When opening the box. Therefore, the base unambiguously needs to be punctured kraft paper on which tasks wrote. Then you can fold the candy with the "scrolls" in the boxes, but do not forget to put in each ten fresh coffee beans. When opening the cake, a noble smell of coffee will appear and add a romantic note to delight from the first impression.
Experienced, we learned that the cake stand should be slightly larger than originally planned. Due to the thickness of the paper, satin ribbon and candies inside boxes, pieces are becoming more! In the layout that you downloaded from our site is already taken into account)


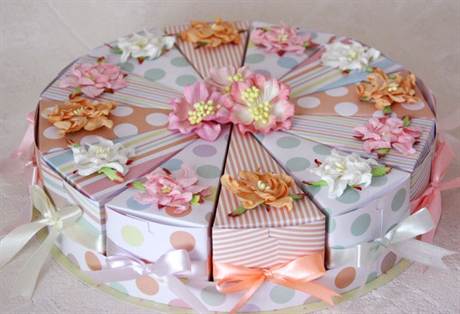
Sometimes I want to surprise friends or relatives and please them in a significant day something unusual. Moreover, gifts made from the soul and do it yourself are always valued and accepted with gratitude and delight. One of these interesting surprises is a cake. What is unusual here, you ask. And the fact that the homemade cake will be completely inedible, but with a lot of good congratulations and pleasant little things. Cake from cardboard with wishes with your own hands is a great gift for any holiday, both adults and children.

Each piece of cake contains the original congratulation and a small surprise, which will definitely raise the mood to its owner, because the psychology of the person is arranged in such a way that opening gifts and get surprises is a guaranteed splash of hormones of happiness. Yes, and such a cake will probably enjoy those who do not eat sweets or follow the figure.
Such a cake is perfect for thematic parties or children's holidays. It is enough to calculate the number of guests, make the required number of pieces, put in every wish with a surprise and spend a kind of lottery or fortune telling - what a desire to be fulfilled from an elongated one or another piece. Without a doubt, the joy from such an event will not limit!
In this article, we find out how to make a cardboard cake with your own hands, what instruments and materials will be useful and what wishes and gifts can be left as a surprise.
Cardboard sweets
So, it will take for work: thin cardboard, scissors, glue, ruler and pencil, for decoration - colored paper, ribbons, beads and all that will tell fantasy.
MK on the manufacture of cake begins with creating a drawing of each piece.
You can use a ready-made cardboard cake template with dimensions, for example, such:

Or print on paper such a template:

We carry stencil on cardboard or draw the item yourself, and then cut out the contour.

For convenience, you can immediately use color cardboard - you will need 13 sheets of different colors. Now in the stationery stores you can find the material not only a variety of bright colors, but also a factory, overflowing, holographic and other types of cardboard. So the cake will look very impressive.
On dotted lines, bend the workpiece to the inside of the cardboard.

We glue the face and make a small cutout according to the following scheme.

We leave a wide side of a piece of pieces to fill it with wishes and surprises.
And now the most interesting is filling the contents of the cake. In every piece we put a note with a wish. Only congratulations can be limited to, but the biggest delight will cause small gifts-surprises, corresponding to each wish.


Cutting pieces close using a slot into the details as a lock. And then decorate the cake with a ribbon or beads.


Ornaments can be very different. Below is a few photos with the idea of \u200b\u200bthe design of the cake:


The polymer clay or plasticine is also successfully suited to create the effect of a real cream or cream on the cake, or in order to put and fix small candles. But you must be careful when using real candles and comply with fire safety rules.
By the way, the pieces of the cake can be made in the form of triangular boxes with a lid, for example, such:

Wish options can be the most diverse, ranging from standard and ending with the most personal and special. Let us give an example of some congratulations and good facilities:
- "Sweet Life" and put chocolate or candy.
- "Bright impressions" - color pencils, crayons or multi-colored candies are suitable.
- "Huge good luck" - symbolizes playing bones or lottery ticket.
- "Indecent wealth" - of course, money or coins.
- "Have a good rest" - a shell or magnet.
- "Good health" - the vitamins are suitable, ascorbic acid or hematogen.
- "Unlimited love" is a small heart.
- "Home heat" - you can put a candle.
- "Family add-on" is a small doll or nipple.
- "Cheerfulness of the Spirit" - the coffee beans are perfectly suitable in beautiful packaging.
And many different surprises and gifts can be invented for any holiday.
Video on the topic
More interesting ideas of making and design Cardboard cake with wishes can be seen in the following videos.
Birthday is always a beautiful and necessarily delicious birthday cake with candles. This delicious object is present not only on the festive table, but also in greeting cards, decorative paper, in which gifts are packaged, on festive stretch marks, posters, etc.
We in this article prepared an original paper cake for you, which will decorate for the room on the day of the celebration or an excellent alternative to the greeting card.
The finished paper cake will become a beautiful toy for young children, because the cake can be decorated with paper strawberry, paper whipped cream, paper cream and paper candles.
So let's start by creativity!
For the manufacture of paper cake you will need the following materials: paper cake templates, glue, colored pencils or markers, scissors.
Paper cake template
Paper cake template
First of all print on white paper. Paper cake templates. Then cut them carefully.
Now glue the details of the cake.
With the help of color pencils or felt-tippers, root the part. You can experiment with color scheme. For example, strawberries can be red, and maybe pink. Cream strips can be one color or vice versa of all rainbow colors. In a word, try yourself as a paper pastry and show off the details in your taste.
Now finished rapid whipped cream, cream, candles, berries, etc. Can be glued to the paper cake.
Do not forget about the name plate. It can be absolutely any digit, it all depends on how many years has been the birthday man.

Now connect the ends of the paper cake and secure them with glue, tape or stapler.
Paper cake ready.

By the way, such a cake can become a thematic head decoration for a festive party.

Video master class:
Today, with thoughts about the cake, not only sweet tooths, but also lovers of original surprises are rejoiced. After all, paper cakes are becoming increasingly popular. In order to "bake" such a gift with your own hands, you do not need to wait a suitable reason for a long time - he will find you: Birthday, wedding, March 8, 14 or February 23, and maybe the anniversary of the first kiss? How to cook a cake from cardboard yourself and how to decorate it, tell me today.
"Bake" easy
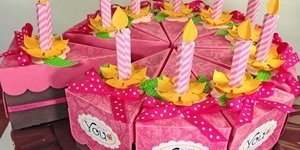
Our paper cake will consist of separate cardboard boxes, outwardly resembling pieces of real cake. If you plan to submit such a surprise on a thematic party to entertain guests - calculate the number of boxes in advance. The most popular is the option of making a paper cake from 12 parts. But if you wish and the availability of free time, your culinary masterpiece may well turn into a two- or even three-tiered paper cake.
To create the foundation of future pieces, you will need colored or white paper, PVA glue or double-sided tape, scissors, ruler and pencil. Paper should be tight enough - not thin with the landscape sheet, in order to keep the form well. Print a ready-made template (the photo on the right increases) on the printer, cut out and result in each piece of paper. Decide whether all the pieces of the same color are either different.
We fold the blank on dotted lines. Use a ruler - then the bends will turn out to be smooth. Now glue the edges using two-way tape: for this, first connect the sharp angle, after - side. We have a pyramid, which opens one compartment. By the same principle glue the rest of the workpiece. Paper cake can be put on a tray or make a base from dense cardboard with your own hands.

Decor ideas
The most responsible and pleasant moment is to decorate the cake. We must turn scattered paper boxes with your own hands in small gifts. For this purpose, all - beads, figures, sequins, serpentine, paper flowers and ribbons will go into move. To decorate a wedding cake, beads, imitating pearls - they will give a gifts a solemn and elegant look. You can decorate the cake with flowers from sweets and corrugated paper made with your own hands. Another interesting idea is a decor patterns in a quilling technique.
Each piece is tied up with a braid, it will not give a gift to fall out of the box. Make small bows from the lace, we glue them with the help of plow glue. In the center of the cake you can insert a candle. Cake frame is ready - it remains to fill it with gifts. 
Wishes with the "highlight"
Now about "stuffing": you can fill the boxes with the simplest objects and provide them with original wishes.
- For a romantic gift to your beloved, pour a few grains of coffee in the bag and attach the inscription: "I promise to wake the smell of coffee in the morning."
- And if you want to hint at the passionate component of your life - to another box to put a condom and write: "I wish the sleepless nights and forces on their holding."
- You can add the wishes of bright impressions and sweet life to chocolate or multicolored dragee.
- Magnets in the form of emoticons decorate the inscription "I wish you smiles and positive."
We wish the travelers with new fascinating adventures and put a bottle with multicolored sand into the box or several seashells. - To the wish of treasures we apply coins and real bills.
- A toy machine can become a symbol of a luxurious and rich life - she also do not forget to wish.
- Home comfort and heat will add a small candle - such a wish will become versatile and suitable for your second half, and for the newlyweds you are invited to the wedding.
The wish of endless energy can symbolize batteries, good health - packaging of vitamin C, incredible good luck - Horseshoe. The number of boxes with wishes and their filling limits only your fantasy.
Make a paper cake with surprises and can everyone. This is a great idea for anyone. More often such cakes - the case of women's hands, however, as the next video shows, a man can cope with a cake, if you wish to congratulate your favorite original and unusual way:


