Properly construct the screed on the foundation. Foundation mesh and screed reinforcement
The integrity and correctness of the reinforcement frame contain many indicators of the value, reliability and durability of the foundation support structure. The reinforcing belt can be seen as a kind of skeleton, which corresponds to a real increase in the strength of the base to the desired effect.
Armor belt  Vlashtuvannya reinforcing frame
In preparation for the future pouring of the foundation, it is necessary, first of all, to consider all the reinforcement and optimally integrate it into a similar structure, otherwise, in some way it is possible to ensure the connection of adjacent elements into a single frame.


You are encouraged to learn more about the safety precautions and important related nuances below.

 Skloplastikovy frame
Diameter
When choosing reinforcement for the foundation, we first pay attention to the diameter of the rods. The principle is simple: the more common the fittings, the more serious needs they have to show. When the optimal diameter is determined, first of all, the characteristics of the soil (the main moment - heaving) are taken into account and the finished spore is transferred to the mixture, the internal lining and the bags/outlets.
 Reinforcement diameter, weight, total cross-section area

So, ideally, you follow the rules. Along with this, a lot of private forgettings are evident from the development of project documentation and the identification of related great developments, reaching the averaged and generally accepted values. As long as there is a lot of daily life in small situations, for example, such as climbing, such an approach is acceptable.


Class
Another important indicator is the reinforcement class. For an individual foundation, choose material class A-3.

Corrugated fittings A3, steel grade A500S, GOST 5781-82
The reinforcement of this group is easy to use (it is easy to bend without the need for special tools), the value is reliable. It is better to use rods of class A-2 (they can be bent by 180 degrees, A-3 – by 90 degrees).

Material
An equally important display is the preparation of fittings. Previously, there was no need for regular food - the rods were made from stainless steel, there were no alternatives.

The future market is constantly developing and expanding. One of the confirmations of this was the appearance of plastic fittings for sale.

These groups are characterized by improved operational and practical characteristics. In the middle of the main transitions of the skloplastikovy reinforcement, the next moments will be indicated:
- high indicators of reliability, value and durability;
- equal to low varity;
- the vaga is small.

The use of flexible plastic reinforcement allows you to save on average up to 30-40% on the purchase and transported material for plating the reinforcing frame aligned with traditional steel elements.

The small size of the plastic reinforcement makes it possible to transport it in a simple passenger car. The reinforcement does not need to be demarcated until the end. To cut lozin, use a grinder first.

Important! In front of the sharp plastic reinforcement, put on dry overalls, gloves, eyepieces and a respirator.
Composite plastic fittings of different diameters are available for sale, which translates into different knitting options. It is important for late reinforcement to be 8 mm long, for transverse reinforcement - 6 mm.
The fastening of skewed plastic reinforcement is most often made in 2 ways:
- for additional help with the tying rod;
- for additional plastic clamps.


The procedure for implementing both methods is identical for steel and fiberglass reinforcement and will be discussed in the following sections.
Prices for skloplastikovo fittings
skloplastikovy fittings
Drill, clamp, retainer: features of basic fasteners
The fastening of reinforcing bars into a single frame can be formed using stiffened rods, clamps and special fasteners. There is a table about them.
Table. Materials for fastening reinforcement
| Bonding material | Description |
|---|---|
| The most traditional, budget-friendly and basic (especially for “old school” workers) material for knitting reinforcement. Made from singed steel. It is important to sell “wholesale”, that is. in packages (more robust, since the material has already been cut into uniform strips) or in special spools. The packaging and the final round of fruit can be changed depending on the vibrator. The most convenient ones are 5-kilogram packs filled with 40-centimeter cut-outs. One such package should contain 1000 to 1500 pieces of wood. |
|
| The principle of knitting has little to do with knitting - the same methods, similar tools. The twist is characterized by great strength (it’s easier to bend and twist). The pieces are more expensive, but they are less expensive. It has a larger diameter (4 mm in diameter versus 1.2 mm in white). To ensure reliable connection of the reinforcing bars, it is enough to twist a 20-centimeter clamp onto one point of the crossbar. | |
| The most current option for connecting reinforcing bars. Fixators are made of plastic. It is best to show yourself in a complex with plastic reinforcement. The advantages over steel reinforcement and knitting dart are obvious. To make them aware, you need to pay attention to just 1 piece of steel reinforcement - it is susceptible to corrosion. It is designed to increase the diameter of the metal rod by an order of magnitude. This value, however, is not changing for the better. Corrosion should be brought before concrete appears. Water penetrates at the pore. As the water freezes, it expands and the cracks become larger. The fasteners do not rust, and connecting to additional fittings is much simpler, easier, and faster. For sale there are a number of different types of fastenings that allow you to securely connect reinforcing bars in various wide areas, plaster “supports” (as in the picture) and fix other problems connected s armuvannyam. |
Looking at those who look at the care associated with the knitting of the reinforcement itself, the order of connecting the rods with special fasteners cannot be seen - this process is not connected with the traditional understanding and in general truly intelligent.
Give the rod and clamps more respect.
First of all, drit.


For the production of such, as intended, low-carbon grades of steel are used. The flammable material is remarkably easy to bend and efficiently copes with the tasks that are placed on it. We sell available non-galvanized coatings in a knitting pattern (black color) and similar galvanized coatings (white).
Many fahivts advocate the purchase of a galvanized knitting rod for finishing the foundation due to the superhumanity and ineffective waste of the foundations, arguing for their position by the fact that the reinforcing frame after pouring concrete becomes inaccessible to the wind, also, etc. there will be nothing to live. However, it is not possible to turn off corrosion, as was stated earlier.


- If you decide to knit steel reinforcement, you can knit it with both galvanized and non-galvanized wire - if corrosion will occur to the reinforcing frame, it will be the same, whether the reinforcement, or the damage, and The basic characteristics of the foundation for such furnishings are not give in. ;
- Yakshcho Vikorishino Vikoristovati to Znplastikov reinforcement, more painfully the health of the gap, the gap of the Tsomo will be the trivial Trival Termin of the Open Structural Service,
Depending on the diameter, the most optimal for ease of use and reliability is the 1.2-1.4 mm option. “Single” is weak for the foundation; work with “double” will attract a lot of attention.
In other words, clamp.

This, as it was meant, is an improvement and reduction in the knitting option. They are made from plastic, not steel, so when such fastenings are removed, the risk of corrosion in the middle of the supporting structure is turned off. In addition, through the material used to make the plastic clamps, many of the clamps suffer from a low supply of power to secure the entire group.
- How can clamps be placed on the vantagement that is created in the middle of the foundation? You can.
- Why won't the fastenings rupture over time, destroying the uniformity of the structure and ruining the foundation? Chi will not burst.
- Is the plastic clamp really reliable? True, but you need to go to your choice correctly.
Corisna is pleased! For knitting reinforcement, it is best to use plastic clamps with a steel wire as a core. Such fasteners are more expensive to construct, lower steel wears out, and they do not pose a problem with handiness in work.
Important note! Plastic clamps cannot be used for knitting reinforcement when working on the foundation in the winter - in the cold, the material of the fasteners almost becomes brittle. Vinyatok are special fixatives made from polyamide.

Prices for drit knitting
Drit knitting
First of all, remember the rule: the fittings are not connected to the welding material, but are connected themselves.
Connection of fittings - diagram
The bottom line is that the contact between the metal and the electrode causes a change in the value of the first layer, which brings about the importance that is expected with minimal possible shrinkage of the foundation, which can lead to catastrophic consequences, after The ice age of them is as follows:
- the place where the fittings are connected will collapse;
- the reinforcing frame falls apart;
- The concrete structure begins to crack.
No comments will be required regarding this threatening the information on the foundation of the structure. As the fault can be seen only in special reinforcing bars, the technology of preparing them according to GOST immediately transfers the possibility of further welding.

In another way, vertical support rods, which are installed as supports for horizontally oriented rods, cannot simply be driven into the ground. The correct way to work is this: the lower reinforcing row is laid on special plastic fasteners (the so-called “clamps”, demonstrated earlier), and the upper part of the vertical runners is connected to the upper row of the frame. By placing this way, turn off the contact of the rods with the external core.


Thirdly, the upper horizontal row of the frame must be tied in the middle - this is more foldable and more correct. Often, uninformed forget-me-nots are allowed to make adjustments, leaving the top row of the frame unfixed. If the concrete is poured by hand, nothing terrible will happen in such minds. When pouring with a special concrete pump, the mixture is fed under a pressure. Open the vise until the reinforcement is pulled to the sides, so that it may become loose.
Fourthly, during reinforcement it is necessary to pay special attention to the corners of the structure, because The stench itself is the weakest link to the foundation. In such plots, the ridges do not fit under a straight edge, but bend. Overlap when they hang in the wall. It is important that the reinforcement bars do not overflow at one point. The principle is demonstrated in the image.

The correct consideration is the reinforcement, which results in a rigid, spacious frame that shows the air of people without visible changes in the structure.
Prices for plastic retainer for fittings
plastic fixture for fittings

For knitting reinforcement, you can use a wide variety of devices - from pliers to special automatic guns.


Using sharp pliers and a wire cutter with teeth that are blunt in front is the best option. Its only advantage is the need to purchase additional attachments and tighten them with similar improvised methods for a long time, manually and tediously. That’s why we lose sight of their gaze.

If you are on a tight budget, you would like to get a basic hook for tying. For this you don’t need anything other than a piece of 4-5 mm diameter, a blank for a handle or an old unnecessary screw/sew and hammer.
To prepare the gachka, do the following:
- prepare your pen. You can use any type of wood to prepare (wood is easier and easier to hammer in flowers), for example, using household tools to serve your purpose. The handle can be made from other materials, brand, so that you can handle it manually;
- beat the flowers into the handle, leaving 3-4 cm loose;
- hold a drop of flower, for example, using a plier or other similar device;
- Bend the flowers from the gutter. It works like this: you place the flowers on a supporting stand, for example, a sheaf, and using a hammer, press the prepared hook into shape for knitting.
The procedure for preparing a hook from twisting/sewing is reduced to the final stage of the induced process. At the exit, you must remove the attachment that may be approaching the appearance.


Knitting with a heavy gag
Having prepared a self-made tool or bought a ready-made tool from a government store, proceed to the finishing work. To begin with, carefully practice on third-party fittings, but do not thoroughly explain the principle of operation. It lies in the future:
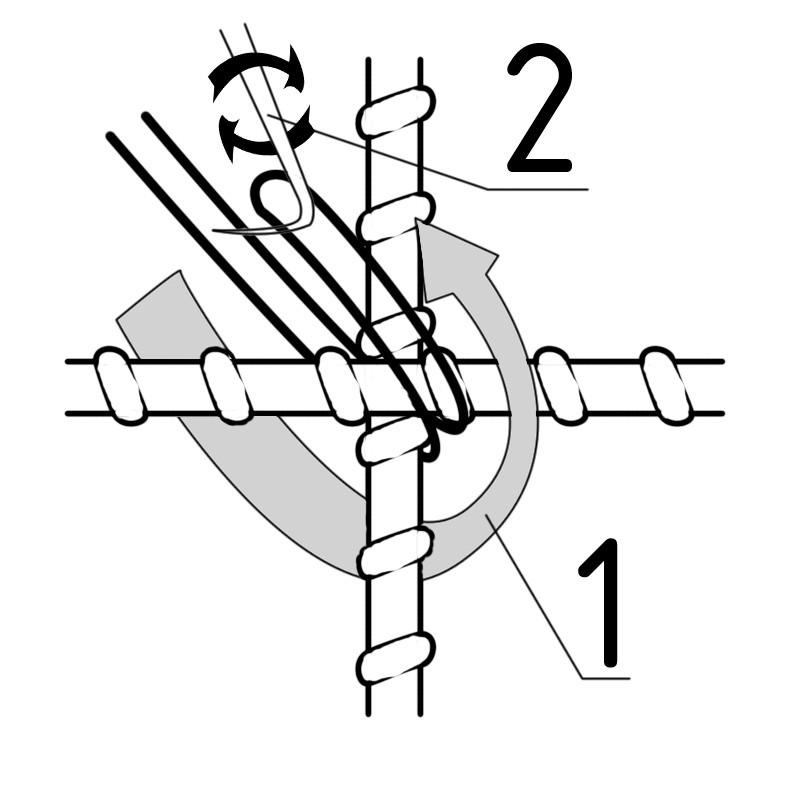
- a piece of knitting material with a length of at least 200 mm is folded all over;
- When cut, the workpiece is wrapped diagonally at the joining point;
- The hook stretches around the closed loop;
- The loose ends of the knitting needle are carefully pulled through the loop. At this stage the hook also helps;
- If the working tool is not removed, turn it behind the year arrow until a reliable connection is released. Depending on the number of turns (up to 3-4) turns. It is no longer possible to twist the thread - it will break. Bend all parts of the ends of the wood. If the ends are too long, you can cut them with wire cutters or other similar tools.
p align="justify"> Schematically the process of representation on the next image.

For a quick understanding of the technology, take a look at the step-by-step illustrations.


There are a number of other options for knitting reinforcement with a hook, but if there is a better way to install it, it is recommended to stick to it yourself.
He also shows himself a nasty way, which is why the Vikonator is guilty of consistently viconting such manipulations:
- fold the cut in half, like at the front cut;
- place warehouses under the fittings at the connection place;
- tie the noose with a hook;
- bend the “tail” through the hook so that it becomes loose;
- tighten the loop.
The procedure for completing the work is clearly demonstrated in the following illustrations.


Video – Knitting reinforcement with slack
Knitting with automatic stitch
The automatic, reversible and screw-type crank is a sophisticated and manual version of the sophisticated attachment.


The length (as a rule, it is 32 cm) and, in general, the special design of the reversible hook allows you to securely twist the bolt in one tightening. A soft hand with a gum and a robot with a tool is still handy and safe, but the culprit is the culprit of calluses on the hands.
The order of this kind of attack is:
- From now on, circle the reinforcing bars with a dart at the junction point (the procedure is the same as for every emergency emergency, all necessary information was provided);
- The hook is inserted into the loop;
- Finally, pull the handle of the instrument towards yourself.

That's all. As a result of such simple actions, the device, which works similarly to the “yule”, quickly tightens the flow, ensuring the removal of a strong, reliable and neat knot. The laboriousness and spending an hour on research will make the work quicker.

The tool is suitable for both professional and private writing. The reversing crank does not require any special technical maintenance - all you need to do is periodically lubricate the working elements with oil.
The principle of operation of the screw hook is demonstrated in detail in a video recording.
Video – Knitting with an automatic stitch
Hand-knitted with a stitch - it takes a long and laborious approach. And although the automatic hook, seen in the front section, makes it easier and quicker to install reinforcing robots, there is a wonderful opportunity to do everything richly and with even less effort. You can also use a drill/screwdriver to help.

All you need to do is prepare a latch (as a workpiece with a diameter of 0.5 cm, according to the principle of preparing a latch, you have already learned in one of the front sections) and fix it in the cartridge. screwdriver in the same way as the original drill bits are installed (details The sequence of replacing the working tool should be specified in the instructions directly from your screwdriver, since for different models of tools these moments may vary significantly.
Look like this design will be in this way.

The following procedure has no bearing on the technology of tying the reinforcement with a hook: you just fold the two pieces yourself, place them under the reinforcement, hook the loop with a hook, or twist it not by hand, but with an additional screwdriver, reporting minimal effort.
When the drill is tightened, the tool practically does not recognize pressure, so for knitting you can use the most budget drill-screwdriver with minimal force. Better yet, the boule model is equipped with a wrapper regulator. In front of the robot, show yourself yogo shonaymenshe.
Video – Tying reinforcement with a screwdriver

The gun can be used to knit the reinforcement as smoothly as possible, either simply or manually - the most sophisticated models of such guns can be assembled in less than a second. No preparatory steps are required: after winding the gun around the spool, the operator simply brings the tool to the connection point and presses the corresponding button. For information on special options and functions, please refer to the instructions for the specific tool.
It looks like this.


There is no need to cut the wood before working: you can make all the tools yourself. This is a great advantage - the output from the appearance of cuttings from knitting is daily, which is why the amount of incomplete expenditures and working expenditures changes significantly.
The gun is hand-held by the robot - it can be trimmed with one hand and the other, while holding the reinforcement frame, which makes it difficult to obtain additional working force from the eyes of the handguns.
An automatic gun, instead of hand tools, allows you to develop a consistently high knitting strength. All models have the function of adjusting the tension and tightening force.
| Pistol brand | Vaga | Size of fittings | Price |
|---|---|---|---|
| 1.4 kg | D19xD18 | 48780 rub. | |
| 1.5 kg | D20xD22 | 60920 rub. | |
| 2.25 kg | - | 52,000 rub. | |
| 2.4 kg | Width 20 to 35 mm | 165,000 rub. |
Among the shortcomings of the automatic gun for knitting reinforcement, you can see the following points:
- high quality of the tool and components (spool with dart);
- the need to first start working with a pistol (with nothing foldable, otherwise the additional hour is still spent. In practice, this is overcompensated by the savings in time spent on rolling the dart);
- the impossibility of using a pistol in highly accessible places. You may be a serious knitting machine, but you still won’t be able to fully cope with the stagnation of hand tools for knitting. For example, you won’t be able to use a gun to tie the rods in the coils of a reinforcing frame. Finally, you can insert the hook between the whips to attach the 2nd ball of the folding frame.
Video – Knitting reinforcement with a gun
A few words about clamps
For knitting reinforcing bars, as intended, you can use special clamps. The stink looks like this.

In this way, one end of the clamp is loose, and on the other the retainer is loosened.
The order of the attack yoke is:
- the vibration will start under the reinforcement strips at the place of the cross;
- The free end is pulled into the opening of the fastener until it stops;
- The position of the fastening is fixed, which ensures the connection of the fittings.
There are many different types of clamps on sale. The most commonly used reinforcement complexes are those made from polyamide 6.6. Such clamps normally “feel” in a temperature range of -40-85 degrees, without bursting, cracking or spreading. A good clamp is elastic. You can check this parameter like this: select the selector and turn it down. As soon as a crack appeared at the place, it appeared as if such a clamp was being removed.

There are special guns available for sale that allow you to carry out the process of cleaning clamps more easily and quickly.

Prices for cable ties (clamps)
cable ties
Video – Knitting reinforcement with clamps
Metal fasteners (connectors) can be added to similar fastenings to connect the reinforcing bars into a single frame. One end of such a mesh is equipped with a hook, the other with a loop. Set the diameter of the steel violin to an average of 2-4 mm. At the place where the reinforcement is connected, the hook and loops are secured to the lower steel bar. The middle part of the clamp presses the upper rod to the lower rod.
 Knitting reinforcement with a violin
  Fiddles for knitting fittings
Far away robots!
Video – Knitting reinforcement for the foundation with your own hands
The string foundation has a non-standard geometry: its depth is tens of times greater in depth and width. Through this design, all the lines are distributed across all the lines. A self-concrete stone cannot compensate for this vantage: its value is not enough. To create a structure of advanced value, not just concrete is used, but reinforced concrete - a concrete stone with steel elements molded in the middle - steel reinforcement. The process of laying metal is called reinforcement of a string foundation. It’s difficult to make with your own hands, it’s an elementary design, see the diagrams.
Thickness, shading, diameter and type of reinforcement - everything is specified in the project. These parameters depend on a variety of factors: both the geological situation at the site and the type of mass. Whatever you want, a guaranteed foundation is required - a project is required. On the other hand, if you are not a big person, you can try on the basis of the following recommendations and do everything yourself, including designing a reinforcement scheme.
Armor scheme
Rotating of reinforcement in a string foundation in a transverse section with a rectangular section. There is a simple explanation for this: this scheme works best.
Reinforcement of a stitch foundation with a stitch height of no more than 60-70 cm
There are two main forces acting on the strip foundation: from below, when frost is pressing, the forces of tearing, and from the surface, pressure from the booth. The middle of the line is becoming increasingly popular in its own right. To compensate for these two forces, consider loosening two belts of the operating fittings: the top and the bottom. This is sufficient for deep, medium-deep foundations (depth up to 100 cm). For deep-set stitches, 3 belts are required: the height is too high and requires strength.

For most string foundations, the reinforcement looks like this
Make sure that the working fittings are at the right place, and they are fastened with great care. I hesitate to use thin steel rods for help. The stench in the work does not take its toll, unless you remove the working reinforcement from its position - create a structure, which is why this type of reinforcement is called structural.

To speed up the work when knitting the reinforcing belt, use clamps
As can be seen in the diagram of the reinforcement of a string foundation, the later reinforcement bars (working rods) are tied with horizontal and vertical supports. They often fail to look like a closed circuit - a clamp. They are simpler and faster to work with, and the design is more reliable.
What kind of reinforcement is needed?
For the stitch foundation, two tipi and darts are used. For later ones, which may be of primary importance, class AII or AIII is required. Moreover, the profile is elastically ribbed: it adheres to the concrete more quickly and transmits gravity normally. For structural bridges, take cheap reinforcement: smooth first class AI, 6-8 mm thick.
The next hour, plastic reinforcement appeared on the market. The seeds of the vibrator have better nutritional characteristics and are more durable. Ale vikoristuvat її at the foundations of living buildings is not recommended for many projectors. The standards include reinforced concrete. The characteristics of this material have long been known and are treated, divided into special reinforcement profiles, which correspond to the fact that metal and concrete are united into a single monolithic structure.

Classes of fittings and diameters
How concrete behaves with sloping plastic, how important it is for such reinforcement to be combined with concrete, how successful this pair is in creating supports for vantagements - all this is unknown and not known. If you want to experiment, be kind, vikorist the scumbag. No – take salvaged fittings.
Do-it-yourself reinforcement of a stitch foundation
Any everyday work is regulated by GOSTs or BNiP. Armuvannya is not to blame. It is regulated by SNiP 52-01-2003 “Concrete and reinforced concrete structures”. This document specifies the minimum amount of necessary reinforcement: it must be no less than 0.1% of the area of the transverse section of the foundation.
Vaznachennya tovshchini armaturi
Since the string foundation at the cut takes the shape of a rectangle, the area of the cut is multiplied by the dow of its sides. If the stitch has a depth of 80 cm and a width of 30 cm, then the area will be 80 cm * 30 cm = 2400 cm 2.
Now you need to know the counter area of the reinforcement. For BNiP you are liable for no less than 0.1%. For this butt it is 2.8 cm 2. Now the selection method is significant, the diameter of the rods and their thickness.
For example, we plan to install reinforcement with a diameter of 12 mm. The cross section area is 1.13 cm 2 (calculated using the stake area formula). It turns out that in order to meet the recommendations (2.8 cm 2), we need three rods (or seemingly “threads”), but two are clearly not enough: 1.13 * 3 = 3.39 cm 2, and more than 2.8 cm 2 what SNiP recommends. It would be impossible to separate the three threads into two belts, but the emphasis would be significant on both sides. That's why they lay out the clothes, laying down a decent supply of goods.
To avoid burying your money in the ground, you can try changing the diameter of the reinforcement: expand it to 10 mm. The area of the hole is 0.79 cm 2 . If you multiply by 4 (the minimum number of rods of working reinforcement for a stitch frame), you get 3.16 cm2, which is also added to the reserve. So, for this option of a string foundation, it is possible to use class II ribbed reinforcement with a diameter of 10 mm.

Reinforcement of the string foundation under the cottage is carried out using vikoristan rods with different types of profiles
Croc installed
For all these parameters there are the same methods and formulas. It's simpler for small houses. According to the recommendations of the standard, the distance between the horizontal nails does not need to exceed 40 cm. We focus on this parameter.
How do you know which stage to lay the reinforcement on? To ensure that the steel does not succumb to corrosion, it must be damaged by concrete. The minimum distance at the edge is 5 cm. The outgoing distance between the bars is 10 cm less than the dimensions of the stitch. If the width of the foundation is 45 cm, then between the two threads there will be 35 cm (45 cm - 10 cm = 35 cm), which meets the standard (less than 40 cm).

The reinforcement structure of the string foundation is positioned between two late rods
If our stitch is 80*30 cm, then the later reinforcement is located one at a time on a distance of 20 cm (30 cm - 10 cm). Since the foundations of a medium-sized foundation (curves up to 80 cm) require two reinforcement belts, one belt is extended from the other at a height of 70 cm (80 cm - 10 cm).
Now let's talk about those who often set up interruptions. This standard is the same in SNiP: the installation period for vertical and horizontal ties must be no more than 300 mm.
That's it. We opened the reinforcement of the string foundation with our own hands. Ale lie, scho Masa Budinka, no geological minds did not lie. We were priming on the basis that on these parameters we were priming according to the dimensions of the stitch.
Armuvannya kutіv
The construction of a strech foundation has the weakest point - the junction of the piers. In these places, there is a sense of beauty from different walls. In order for the stench to successfully dissipate, the fittings must be properly bandaged. Simply connecting them incorrectly: this method will not ensure the transfer of interest. After every hour of the war, cracks will appear in the strech foundation.

The correct scheme for reinforcing the cut is: twist or drive - L-like clamps, or break the later threads further by 60-70 cm and bend them behind the cut
To avoid such a situation, when armouring the cut, use special schemes: bend the dart from one side onto the other. This “flooding” is no less than 60-70 cm. If the late rod does not stick out on the bend, vikorist G-like clamps with sides are no less than 60-70 cm. Schemes of their placement and fastening of the reinforcement are shown in the photo lower.
The same principle is followed when mixing prostinki. It is also necessary to remove the reinforcement from stock and destroy it. It is also possible to use G-like clamps.

Scheme of reinforcement for connecting walls to a stitch foundation (to enlarge the picture, click on it with the right mouse button)
To restore respect: in both cases, in the corners, the installation of transverse jumpers changes twice. In these places, the stinks are already becoming robotic - taking their share from the revival of vantage.
Reinforcement of the base of the stitch foundation
On soils with a not very high building value, which carries, on heaving soils or under important buildings, often the foundations are broken from the bottom. It transfers pressure to a large area, which gives greater stability to the foundation and changes the amount of subsidence.
To ensure that the sole does not fall apart under the pressure, it is also necessary to reinforce it. There are two options for the little one: one or two belts of late reinforcement. Since the belts are folded, with strong elasticity before winter, two belts can be laid. For normal and medium-heavy soils, one is enough.
The reinforcement rods are placed in the dovzhin by robot workers. Yes, as for stitching, take another or third class. One type of one stink will grow at a distance of 200-300 mm. Call for help in short bursts.

Two methods of reinforcing the base of a strip foundation: right-handed for foundations with normal non-supporting construction, right-handed - for unreliable soils
Since the sole is not wide (stiff design), then the transverse cuts are constructive, and do not take their place from the other side. Then cut them with a diameter of 6-8 mm, bend them at the ends so that the outermost darts smell. Tie a knitting rod to everyone for help.
If the sole is wide (bed pattern), the transverse reinforcement at the sole is also functional. Vaughn promises to try to “collapse” the soil. In this case, the soles are made of vikorist reinforcement with ribbed reinforcement of the same diameter and class.
How many rods are required?
Having developed the reinforcement scheme for a string foundation, you know how many later elements you need. The stench is located along the entire perimeter and under the walls. A dovzhka of a stitch will be a dowzhina of one rod for reinforcement. By multiplying it by the number of threads, subtract the necessary amount of working reinforcement. Then add 20% to the calculated figure - a reserve for sticks and “overflow”. The axis of the insole is measured for you and you will need working fittings.

Follow the pattern of how many later threads, then trace how many structural rods are required
Now it is necessary to repair a large number of structural reinforcement. It is important to consider how many transverse jumpers there are: divide the length of the stitch by the installation length (300 mm or 0.3 m, in accordance with the SNIP recommendation). Then you know how long it takes to prepare one jumper (the width of the reinforcement frame is added to the height and rootstock). Once you find the number, multiply it by the number of jumpers. You also add 20% to the result (for connection). There will be a large amount of structural reinforcement for reinforcing the string foundation.
Following a similar principle, you pay attention to the strength needed to reinforce the sole. Having collected everything at once, you will find out how much reinforcement is needed for the foundation.
Technologies for collecting reinforcement for string foundations
Do-it-yourself reinforcement of a strip foundation begins after the formwork is installed. There are two options:
- The entire frame is assembled from a foundation pit or trench. Since the haircut is high and high, it’s so clumsy to practice.

One of the technologies involves knitting the reinforcement directly into the formwork
The options are not ideal and the skin is in danger, as if it would be easier for you. When working directly in a trench, you need to know the procedure:
- The later rods of the lower reinforced belt are laid first. They need to be raised 5 cm above the edge of the concrete. It is best to choose special legs for this purpose, and for the forgetful ones the popular shmatki are on target. The reinforcement is also removed from the formwork walls by 5 cm.
- Vicor cross-section strips of structural reinforcement or molded contours are fixed on the required stand behind an additional knitting rod and hook or knitting gun.
- Then there are two options:
- As soon as the contours were formed in the form of the straight cuttlefish, the upper belt was tied to the animal before them.
- When installing the vicor, cut the strips for the transverse bridges and vertical posts, then the front edge is used to tie up the vertical posts. After everything is tied, tie another belt of late reinforcement.
Another technology for reinforcing a strech foundation. The frame will be stiff, otherwise there will be too much wear on the rod on the vertical posts: they should be hammered into the ground.

Another technology for reinforcing a stitch foundation is to drive in vertical posts, tie later threads to them, and then connect them with transverse ones.
- Drive vertical posts into the corners of the stitch and at the places where the horizontal rods are connected. Guilty posts large diameter 16-20 mm. They should be placed at a distance of at least 5 cm from the edge of the formwork, varying between horizontal and vertical, and hammered into the ground at 2 meters.
- Then hammer vertical darts of about the same diameter. We calculated the installation time: 300 mm, in places where the joints between the two sheets are less - 150 mm.
- Tie the later threads of the lower reinforcement belt to the posts.
- Horizontal jumpers are attached to the crossbars of the posts and later fittings.
- The upper belt of the reinforcement is attached, which is spread 5-7 cm below the upper surface of the concrete.
- Horizontal jumpers are attached.
It is stronger and faster to work the reinforcing belt with the victorious molding of the contours behind. The rod is bent, forming a rectangle according to the given parameters. The whole problem is that they need to work the same way, with minimal assistance. And they require a lot of strength. And then the robot near the trench collapses rapidly.

The reinforcing belt can be knitted together, and then installed in the formwork and knitted together in place
As you know, reinforcement of a string foundation is a difficult and not the simplest process. Or you can go back alone, without assistants. It’s really necessary, a lot of time. Do it twice and three times more manually: transfer the rods and insert them.
Reinforcement of a stitch foundation with your own hands: diagrams, layout of the diameter of the reinforcement, spreading along the edges and in the sole
How to open and create the reinforcement of a stitch foundation, choose the thickness of the rod, stand between the threads, diagrams of reinforcement and adhesion, folding technology - you will find everything here.
Often, cracks that appear in private booths can provide plenty of nutrition and vitality to their rulers. As a rule, this means that at the development stage a compromise was made, as a result of which cracks are created.
It’s not easy to immediately panic, even if the situation can be avoided. It is first necessary to establish the cause of the crack, and only then can a special screed be applied to the booth.
Causes of cracks
 The main reason for cracking of walls is shrinkage of the foundation
 All the reasons given in the table will speed up the formation of cracks in the booths. The main factor behind this kind of wada is the subsidence of the foundation of the sporudi. If you look at the furniture, then the cracks can be eliminated, and they will be of minimal size. Well, the reasons and descriptions before them, through which the behavior appears, are listed in the table:
| Cause | Description | Methods of the most common problem |
|---|---|---|
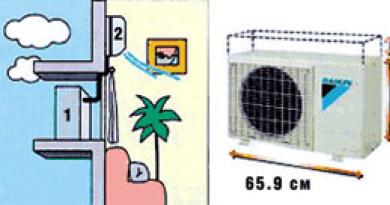
| There are no similar materials between the whole | It turns out that even before the cabin is ready, another cabin is being completed. As a rule, cracks begin to appear on the surface itself, and fragments begin to come out of the main structure. | Once the fitting is secure and no longer moves, you can fill the crack with putty. Another way to solve the problem is to screed the booth. For this purpose, metal bundles of 10x10 cm are installed in the bundka bundles, a cord is fixed between them and tightened with nuts. |
| Shortage of available materials | If repairs have started during the day and there will be insufficient damage, then after shrinkage the foundation may develop a crack. | Solve the problem using a screed similar to the one described above. |
| Technologically damaged masonry target | A crack can go along the seam, resulting in the loss of the whole. In other words, a crack found a weakness in life and began to appear. | There is no solution to fixing such a problem, which will solve everything, and you can only plug the crack with cracks. The problem is that when waking up, the whole thing was not wet, but was put on the table without pressing, which still leaves the head weak and tendentious. |
| Appearance of apex crack | As a rule, the problem that arises in the future is that there is a lot of effort and a lot of effort on the foundation. The problem lies with insufficient reinforcement of the joints or connection. | The problem could be caused by the screed or the foundation. |
Having identified the main causes and peculiarities of the damage, it is possible to develop a solution so that in similar situations the same solutions will be tightened. Of course, this method is not only aesthetic, but reliable.
Cracks in the building were never to be spoken of as damage to the walls. The trace will roll over, so that the very non-solid materials will touch.
Basic rules for ties of budinki
 Steel Kutochki
 In a ready-made joint, a screed is necessary to prevent the appearance of new cracks, as well as to ensure that damage that has already appeared does not get worse. The technology has proven itself miraculously to date. To screed a booth with dimensions of 6x6 meters and a height of 3 meters, the following materials will be required:
- Steel rolls 10x10 cm – 4 pcs. 3m each
- Rods in diameter 16 mm – 48 m.
- Thick-walled pipe, the diameter is similar to that of the slides - the length is 1.5 meters.
- Hairpins with grooves for laces - 16 pcs.
- Nuts and washers - 16 pcs.
 Threaded studs
 To tighten the booths, you need to install metal bundles along the frames of the frame. Sections from thick-wall pipes are first welded onto them. The studs are fixed before the runners, and after that the entire structure is tightened using additional nuts. For the reliability of the entire structure, follow these rules:

To be precise, take a look at the screed of the booth under the cracks in the walls in the photo. This allows you to deal with the fastenings and the structure as a whole:

After the work has been completed, the booths can be covered, for example, with siding, otherwise access to the nuts for tightening them can be denied.
 If the damage is minor, other features may be affected. ? For whose sake vikorystuvat such sake:
- In case of minor damage, such that the filler does not exceed 5 mm, you can use the original putty.
- If damage is up to 1 cm, it is necessary to use sand and cement at a ratio of 1:3.
- In case of large and deep damage, it is recommended to seal the crack with foam, after which apply cement-based repairs.
Before you print your work, please read the recommendations of the facists.
The most common reason why cracks appear is the overvaluation of private cabins due to incorrect calculation of snow supply.
First, cover up the damage, you need to remove the brood, drink and other smіtya. It is also recommended to wet the area that is being repaired to ensure a faster bonding of the materials. For a report on how to install a screed at home, watch this video:
As soon as cracks begin to appear in the house, then we can sing that there is no sign of it. The problem can be solved by screeding and strengthening the foundation. If the robot is installed correctly, the damage will not increase, and the booth will be provided with reliable protection from dozens of fatalities.
A crack in the building is not only unsightly, but also dangerous. Even if there is a crack in the building, it’s not just a legacy, but the reason is deeper – it’s not a crack in the foundation itself, but a direct route to the emergency room and further ruin. Most often, there is no need, and there is no possibility of building a new one, so they came up with a way to save the existing one - screeding the alarm box with reinforcement. Before you begin the repair, you need to understand all the nuances. The price of the booth screed depends on its complexity and, especially, the cost-effectiveness of the materials. All this will help you to protect yourself from the alarm, which will help you in the future. The screed of a private cabin can be done independently, which will lead to significant savings. Buy in advance all the materials that can be extracted, and also secure those that are needed to add foundation to the foundation.
It is necessary to tie the booth with reinforcement, in order to obtain serious knowledge of the welding and design of the required diameter of the reinforcement. Its size is selected depending on the stage of construction, the surface of the booth and its size. Ale fakhivtsi also take care of the shape and coating, the type of foundation, the soil and the region of residence. All these nuances may not be appreciated by the occupant, but the cost of screeding the booth with fittings, which is not so great, is serious on the right and should not be dealt with by professionals.
As soon as a crack appeared on some of the other plots of the booth, until the walls of the booth were screeded with reinforcement, they were re-laid. The plots that are especially sought after can be tightened with greater thickness, reinforced with reinforcement. For this kind of screeding of a booth with reinforcement, you don’t need a lot of materials: the reinforcement itself is of the required diameter, studs that indicate the size and cut of the reinforcement, washers and nuts.
The technology for installing the reinforcement is simple - stops for the rod are welded on the coils; for the skin wall, the rhubarb has to be cut, to avoid the abutment of the pins and nuts. Take off the rolls and attach them to the frame, then pull the pins against the stops, on which the washers are pulled in and the nuts are screwed on. Behind the nuts there is a tie rod.
When tightening the frame with reinforcement, it is not possible to immediately tighten the nuts, work step by step, especially so that periodically, about once every time, the nuts must be re-tightened. You can find out the quality of the bundle for screeding the booth on the Internet in order to navigate in its ranges.
After the work has been carried out, the final stage – priming and preparation – is lost. A booth screed, whose prices vary depending on the assembled fittings, will in any case become an economical option for you. Even walls that are cracked are much easier to repair than to rebuild. Vartistya tyaguvannya booth, which is cracked, will help you understand the master who is working on his repairs.
If the cracks are very large and there is deformation in the different sides, then tying the frame with reinforcement cannot completely cover the defects, it is necessary to reduce the strength of the frame, for re-fixing the frame it is necessary It is important to strengthen and strengthen the foundation.
How much does it cost to screed a house?
Screeding the booth with fittings, the price of which lies in the professionalism and quality of the work of the Vikonavians. These repair robots are the most reliable and reliable solutions for eliminating small cracks and stench, which have become widely used in practice.If you don’t want to forget about the fact that self-construction of the booth requires serious knowledge from the boiler, as it is known on a daily basis, it is better to trust the fakhivtsev to carry out all planned repair work.
With skin disease, new types of daily life appear. For example...
Armature
Reinforcement is a collection of interconnected parts and elements that, together with a material such as concrete, are compressed in concrete spores like beams that are stretched under tension. Vikorist reinforcement is used to increase the resistance of concrete in columns.
Let's look at the classification of types of fittings.
Regardless of recognition, the fittings are:
- robotic (peretin is assigned to the rozrakhunk, zusilla is used in parts of the main area);
- structural (separate reinforcement that absorbs shrinkage/expansion, inflow temperature);
- installation (installed to combine structural and working parts); - anchor (shutter parts).
It is important to consider the orientation of the structure:
- transverse reinforcement, which actively overcomes stress cracks that arise in the supports and connects the concrete with the reinforcement from the compressed zone to the tensile zone;
- late reinforcement that directly and completely absorbs tensile stresses, which overcomes the formation of cracks in stretched areas of the structure.
Stagnant reinforcement remains in the minds of:
- unstressed;
- It’s straining.
In stressed reinforced concrete structures, the reinforcement is fully operational.
There are five possible contact options for reinforcement and concrete:
- rubbing contact with concrete structures;
- connection on the links of the zsuwu;
- consolidation (the process of consolidation during concrete placement of a steel reinforcing element);
- interaction between cement and steel reinforcement at the electrochemical level;
- pressing of reinforcement for additional concrete after shrinkage.
The wall of the booth has burst, the roof has broken, the foundation has burst - the booth needs a screed. If the screed cannot be created, it will lead to serious consequences.
You can entrust the screed of the booth to the facists, or you can make this type of work yourself. There is nothing military or unknown about him. For this purpose, we need to prepare a welder before qualifying, theoretical preparation and time for real analysis.
The dimensions of the rolled metal for screeding should be selected in the area depending on the dimensions of the material that will be tied, as well as in the area depending on the degree of damage (cracks). So for a single-surface structure with dimensions of 6×6 meters and minor cracks, it will be sufficient to install 63 mm coils, reinforcement or a rod Ø 16 mm (more thickened with smudge). Obviously, to increase the dimensions, it is necessary to select larger metal products.
If you definitely have left the house, it may be necessary to remove it and re-install it before you leave the screed.
On problem cuticles, you can place a smaller cutlet, or simply strengthen the cutlet by boiling it into a new cutlet.
Also, the necessary studs, washers and nuts (sold both assembled and sealed) are required for the installation. The diameter of the stud is no less than the diameter of the reinforcement. If you are not making reinforcement, but a rod, then you can save money on the purchase of studs by cutting threads onto the rod. The thread is cut with the help of an additional cutter (a file, a progine - a tool for cutting external threads). The pin is welded overlapping to the point.
Then we move straight to work. On a piece of leather metal we weld it at the bottom and support the animal for the dart. You can use a pipe scraper with an internal diameter slightly larger than the diameter of the rod. For one wall, the stops must be welded at the same height, for the rest, higher or lower, so that the studs and nuts that extend beyond the boundaries do not press against each other.
Then it’s easier to install the prepared metal rolls on the main cutout. At the stop we tighten the pins. On the studs from the opposite side of the stop we put a washer and screw a nut (on the thread of threads). As required, the rods are welded together with an overlap of at least 7 cm.
After collecting all the metal structures, we trust the production of the metal structures to the specialists from the METAKON company, tightening the nuts from all sides. Keep in mind that the nuts cannot be tightened in one go, so you need to tighten the nuts evenly. It is necessary to tighten the nuts once per quarter.
Then all the beauty that came out is primed and coated.
After the screed, the booths can be “walked”, leaving us with more zusillas, straight at the side. Even if you want, the walls of the booth can still collapse up and down. To achieve this, it is necessary to strengthen and insulate the foundation of the cabin.
Often, cracks that appear in private booths can provide plenty of nutrition and vitality to their rulers. As a rule, this means that at the development stage a compromise was made, as a result of which cracks are created.
It’s not easy to immediately panic, even if the situation can be avoided. It is first necessary to establish the cause of the crack, and only then can a special screed be applied to the booth.
The main reason for cracking of walls is shrinkage of the foundation
All the reasons given in the table will speed up the formation of cracks in the booths. The main factor behind this kind of wada is the subsidence of the foundation of the sporudi. If you look at the furniture, then the cracks can be eliminated, and they will be of minimal size. Well, the reasons and descriptions before them, through which the behavior appears, are listed in the table:
| Cause | Description | Methods of the most common problem |
|---|---|---|
| There are no similar materials between the whole | It turns out that even before the cabin is ready, another cabin is being completed. As a rule, cracks begin to appear on the surface itself, and fragments begin to come out of the main structure. | Once the fitting is secure and no longer moves, you can fill the crack with putty. Another way to solve the problem is to screed the booth. For this purpose, metal bundles of 10x10 cm are installed in the bundka bundles, a cord is fixed between them and tightened with nuts. |
| Shortage of available materials | If repairs have started during the day and there will be insufficient damage, then after shrinkage the foundation may develop a crack. | Solve the problem using a screed similar to the one described above. |
| Technologically damaged masonry target | A crack can go along the seam, resulting in the loss of the whole. In other words, a crack found a weakness in life and began to appear. | There is no solution to fixing such a problem, which will solve everything, and you can only plug the crack with cracks. The problem is that when waking up, the whole thing was not wet, but was put on the table without pressing, which still leaves the head weak and tendentious. |
| Appearance of apex crack | As a rule, the problem that arises in the future is that there is a lot of effort and a lot of effort on the foundation. The problem lies with insufficient reinforcement of the joints or connection. | The problem could be caused by the screed or the foundation. |
Having identified the main causes and peculiarities of the damage, it is possible to develop a solution so that in similar situations the same solutions will be tightened. Of course, this method is not only aesthetic, but reliable.
Cracks in the building were never to be spoken of as damage to the walls. The trace will roll over, so that the very non-solid materials will touch.
Basic rules for ties of budinki
 Steel Kutochki
In a ready-made joint, a screed is necessary to prevent the appearance of new cracks, as well as to ensure that damage that has already appeared does not get worse. The technology has proven itself miraculously to date. To screed a booth with dimensions of 6x6 meters and a height of 3 meters, the following materials will be required:
- Steel rolls 10x10 cm – 4 pcs. 3m each
- Rod in diameter 16 mm - 48 m.
- Thick-walled pipe, the diameter is similar to the pipes - length 1.5 meters.
- Hairpins with grooves for laces – 16 pcs.
- Nuts and washers – 16 pcs.
 Threaded studs
To tighten the booths, you need to install metal bundles along the frames of the frame. Sections from thick-wall pipes are first welded onto them. The studs are fixed before the runners, and after that the entire structure is tightened using additional nuts. For the reliability of the entire structure, follow these rules:

To be precise, take a look at the screed of the booth under the cracks in the walls in the photo. This allows you to deal with the fastenings and the structure as a whole:

After the work has been completed, the booths can be decorated with building materials, for example, siding, but access to the nuts for tightening them can be denied.
 If the damage is minor, other features may be affected. For whose sake vikorystuvat such sake:
- In case of minor damage, such that the filler does not exceed 5 mm, you can use the original putty.
- If damage is up to 1 cm, it is necessary to use sand and cement at a ratio of 1:3.
- In case of large and deep damage, it is recommended to seal the crack with foam, after which apply cement-based repairs.
The most common reason why cracks appear is the overvaluation of private cabins due to incorrect calculation of snow supply.
First, cover up the damage, you need to remove the brood, drink and other smіtya. It is also recommended to wet the area that is being repaired to ensure a faster bonding of the materials. For a report on how to install a screed at home, watch this video:
As soon as cracks begin to appear in the house, then we can sing that there is no sign of it. The problem can be solved by screeding and strengthening the foundation. If the robot is installed correctly, the damage will not increase, and the booth will be provided with reliable protection from dozens of fatalities.
It has become so that no matter what the wall is, there is a crack in the foundation - it’s not yet broken, it’s just that the time has come to take “global” (radical) approaches to strengthen the entire structure. About the simplest and most popular methods of preserving the integrity of the matter, we can see in this article.
Note. The statistics are correct in terms of terminology.
Buying ready booths, the new ruler is always on the right with the cat in the bag. Moreover, it doesn’t matter whether it’s new or the old one is repaired. The contractors build and repair cottages and private cabins in a fantastically short period of time, which is always noted for their durability and durability. Regardless of the reasons for its appearance, a crack is a frequent and faithful companion of stone structures. There are numerous types of these unacceptable and unsafe defects - structural cracks, which serve as signals about the appearance of fragility of load-bearing elements. To pin down the development of a crack, fix the structure and fix the elements, and then repair and “mask”.
Note. A crack in the sample always indicates the presence of wall defects. The trace will roll over, causing damage to the load-bearing material itself, removing part of the workpiece and exposing the defective area for care.
Let's go beyond the theory and look at the three most common types of elements that can cause fragility: collapse, collapse and separation of arrivals.
Roswaal
When the walls fall apart, there is a visual difference from the vertical, sometimes in a contorted way. The walls can also be flexibly deformed or have a flat surface. Most often this is accompanied by the appearance of cracks in the upper layers of door and window openings.

Behind the step of hooplenya, the rozval mozhe buti:
- Let's remember. All external external walls are deformed in various ways.
- Nepovnym (chastkovim). The sides of the wall are deformed.
In both situations, if only one wall is falling apart, it is recommended to tighten a preventive screed from all sides in order to prevent the development of cracking on other walls.
It’s important to stop at the level of the collapse of the walls and enter the depths of the water. We mentally divide the level of collapse into three categories - light, medium and strong, and it is possible that skin conditions will stagnate.
Easy rollover
Signs
The heads of the walls are clearly deformed sections up to 1/3 of the height of the wall (without the height of the foundation). Cracks along the edges of the openings in 50% of cases. Other parts of the walls and foundation are normal (no cracks or deformations).
Cause
It comes down to the unreliability or lack of armored belts, which is necessary for the installation of an attic on top of the old walls.
Note. The most extensive mercy that leads to the revantazhenya dahu - nevrahovane snow navantazhenya.
Suspension method
In this case, for screeding the walls, it is reasonable to place a steel mono-clip (referred to as a clip) on the heel stops. In this case, as in all types of stagnation of different frames, the rods pass along the façade of the walls, which are shaped like a rectangular one. Sometimes it is necessary to operate technological openings for drafts at the arrival walls.
What you need:
- Steel coil 100x100 mm (minimum 75x75) – 4 m.
- Pipe 1 inch - 1 m.
- Hairpin with threads 20 mm – 4 m.
- Nuts and washers under the stud.
- Kolo (steel rod) with a diameter of 20 mm or smuga 40x4 mm - extending into the perimeter of the booth.
- Zvaryuvannya, farbuvannya.
Note. It is not necessary to stiffen the fittings for rods, because they are not insured for external work and are susceptible to corrosion.
How to prepare a helical stop: on a steel heel of 100x100 mm of the hem, which extends from the top of the wall to the top of the window slots plus 20%, weld the hem pipe sections of 150 mm.

The number of stops is the same as the number of cutters (4).
The order works:
- The rods (smug) are boiled in two separate batches one by one along the walls of the booth minus 200 mm (during tightening).
- Then, at the ends of the beams, studs with a wide end of 200 mm are welded.
- The pins are pulled into tubes and the tubes are boiled together in the middle.
- The entire structure is assembled on the ground and fixed at the required height.
- Tighten the nuts until they are tight.
Respect! Vikorist steel frames and ties, remember that they are used for fixing walls. Trying to turn the walls at the exit can turn into lies and collapsed plots.
The design of the steel frame can be changed. For example, in case of various slight deformations, it is possible to tighten the channel as one, a number or all four rods. The installation will be foldable, but all the accessories from the wall will be evenly distributed along the rigid channel.
Middle spread
Signs
All signs of slight collapse are expanded to the level of 50% of the wall height (without leveling the foundation). The prevalence of cracks at the edges and between the slots is 80%.
Cause
Weak armored belt. The number of connections between the walls and the masonry of the wall materials, high wear and tear of the material, re-vantagement.
Suspension method
In these cases, tighten the welded end of the clip. It is clamped in a similar way to mono clips, but along the entire height of the wall and has more screed belts. For medium camber, it is recommended to wear three belts.

In all types of cases, the ring can be replaced with 10x40 mm slime.
Respect! The welded seams smell like hot water (the stench smells bad). Overflow - 250 mm.
Strong collapse
Signs
All signs are medium and light, but on the level above 50%. In most cases, falls are accompanied by the appearance of deep, sometimes open, cracks along the walls and foundation.
Cause
The most common deformation of the foundation of the combination is due to the causes of mild and moderate collapse. You can repair some of the foundations.
Suspension method
For repairs, install the main frame and the supporting wall (support) or support belt to the foundation.
A support wall or support is a part of a reinforcement belt, mounted on a deformed section.

The supporting belt is a repair structural element used for strengthening existing foundation walls throughout their entire life. There is concern for the needs of the foundation. Material – reinforced concrete.
Vlashtuvannya support. Let's take a look at the butt of the cut wood. The waist belt is lashed in a similar way.
It is necessary to determine the size of the support. Since we have had to go to such radical lengths, it means there is a need to work hard, especially since the essential foundation is being lost in place. Therefore, we will forgive the deterioration of the reserves in order to increase the stock of money. The thickness of the support must be 50% of the thickness of the wall of the foundation, and not less than 400 mm. If possible, the bottom support and foundation should be placed on one level. The optimal relationship between the above-ground part and the underground part is 1 third above the ground, 2 thirds below the ground.
Respect! The reinforcement rods on the curtain rods were bent (bent at 90°). The minimal side of the cut support is similar to the three sides of the support.
The order works:
- We dig up the damaged plot and clean it with a trench. We clean the foundation wall of any traces of organic matter and excess waterproofing.
- We drill an opening at the wall of the foundation with a diameter of 18 mm to a depth of 200 mm in a checker pattern with a edge of 200 mm.
- We drive in reinforcement bars with a diameter of 16 mm and a length that equals the standard support plus 200 mm (hammered into the wall) minus 40 mm (dry ball).
- The working reinforcement with a diameter of 16 mm and a edge of 200 mm is tied with a knitting dart to the stitches.
- Prepared from 10 mm reinforcement, U-like clamps with dimensions for the beam frame (support) 600x360x600 mm (workpiece depth 1600 mm) and installed with a cross-section of 200 mm.
- We install formwork according to dimensions.
- We lay concrete (prepared at the factory) with vibrations.
- After compacting the concrete (3 pieces), the formwork is removed and waterproofing is applied.
- The gate is filled with soil from the rammers and poured.
 Reinforcement support: 1 – foundation; 2 - working L-like rods Ø 16 mm; 3 – formwork; 4 - U-like clamps Ø 10 mm; 5 - rods driven into the foundation, Ø 16 mm
Vitrati device 1 linear. m support with a thickness of 400 mm, a height of 600 mm when concrete is prepared on site:
| Name | Od. change | Quantity | Price per unit, rub. | Zagalna article, rub. | Note |
| Armature 16 | linear m | 20 | 30 | 600 | Wipes at the wall and working shears |
| Armature 10 | linear m | 10 | 20 | 200 | P-like clamps |
| Knitting drit | kg | 0,5 | 200 | 100 | Linking all elements to the frame |
| Concrete | cube m | 0,25 | 1000 | 250 | |
| Waterproofing | sq. m | 1 | 20 | 20 | |
| Vitrati on the formwork | sq. m | 1 | 100 | 100 | Samonarizi, flowers, doshki |
| Additional expenses | - | - | 300 | 300 | Disks, drill and in. |
| Together material | 1570 | To lie under the minds of the locals and to the agreement | |||
| Robot | 1000 | ||||
| Material and work at once | 2570 |
Zaval
The walls were piled in the middle. Mozhe buti povnim chi chastkovim (nepovnim). At different stages of deformation (mild, medium, severe), the chipping method is used.
Note. To repair the rubble, it is necessary to carry out welding work in the middle of the area, which is most often associated with the overhaul of the building. Tell me about fire safety.
Povnyi obstruction
Sign
The middle was filled with three or more walls (of various types).
Cause
Weak reinforced belt, wear of material, damaged technology during everyday life (weak breaking, lack of reinforcement of cutouts, etc.).
Suspension method
The rigid part is a self-supporting steel frame (frame) on a threaded fastening.
What you need:
- Perforator with drill 18-20 mm.
- Channel 50x100-150 - dovzhina, which is similar to the perimeter of the walls, which needs to be strengthened.
- Steel plate 200x200x3-4 mm (up to 300x300).
- Reinforcement 16 – 3 thicknesses of wall per linear meter of frame.
- Good preparation (voltage), farbuvannya.
Robot order:
- This means the perimeter of the walls, which adds strength. If necessary, we punch technological openings (for the channel) at the partitions.
- We break the skin wall into slices close to 600-700 mm (or no more). ½ layer emerges from the skin.
- Open the drill bit 18-20 mm.
- On the steel plate, perpendicular to the reinforcement bar, we weld a length equal to the thickness of the wall plus 100 mm.
- We install the anchor in the opening using a plate called.
- Trying on a leather channel in the middle, mark it before opening it.
- Before welding, open the channels under the fittings.
- We prime the outer surface of the channel with a primer (let it touch the wall).
- We install the channel on the rod in the opening.
- We boil the stitches in the openings.
- This is how we install the extension of the channel itself.
- If the entire perimeter of the installations is made, we weld the channel together along the stick and welded linings from the reinforcement 16 - 2 per stick with an overlap of 300 mm.
- It is reinforced by any available rank (for cooking).
The ideal option for such a frame is that it will then be covered with a hanging frame. Then you can create diagonal thrusts. Since the hanging frame is not pumped, the tire is covered with a box.
Respect! The bell plates and fittings are welded to them, so that they pass through the middle of the wall - a strong place for cold and condensation in the wall. It is easy to insulate the plates, or rather the entire wall.
Chastkovy obstruction
Sign
One or two walls are littered.
Cause
The walls are washed close to the rotting part (with the tram). Submerged by atmospheric waters.
Suspension method
Attachment of a partial clip to the principle of sustenance. The side of the torn kut is as high as one third of the wall, or at least 1.5 meters.
 Washing of partial internal rims: 1 - wall with rubble; 2 – reinforcement with plate; 3 - channel 100x50x4 mm
In case of combined collapses/blockages (if the walls diverge on different sides), fasten the inner frame (at the front) and the outer screed (at the other end) at the same time. In some cases, all stronger options or combinations thereof are used.
Frame size of 1 linear meter of internal frame:
Department of arrival
Let’s take a look at the most complex and currently popular type – combinations.
Sign
There is a clear crack along the inner wall or along the arrival stick with the main booth from the middle or strong collapse of the outer wall.
Cause
The number of days of connection to the wall of the main booth before the hour of arrival (in 90% of cases). Weak foundation under the walls of Pribudovo. Perevantazhennya pribudovi (nadbudova, balcony).
Suspension method
Combination of threaded, threaded or anchored rings and support:
- The yoke is cut through - the rods pass through the wall, which is carried, and are secured (nuts, welding) on a fixed tire or plate, pulled out from the inside of the wall.
- The frame is cut-through - one side is cut-through, the other is secured to the fastening part.
- Anchor clip - rods are secured to the embedded parts, wetted on the anchors near the walls.
 Options for the screed: 1 – through-drawn; 2 - scraping; 3 – anchor; 4 – rolls 100x100 mm; 5 – rods (rod, plate); 6 – capital walls; 7 – plate behind the anchor; 8 – plate 4 mm
You can control any of these types of clips, follow the instructions below.
Rules for fitting anchor rods:
- The tire or plate is worn out, it is moved in the middle, and should not be sunk onto the top of the door opening.
- The embedded parts in the walls must be fixed at a distance of 1/3 of the wall when it arrives, which is placed against the wall, or not less than 1.5 meters. Bury 3 dots with a diameter of 12 mm, depth 2/3 of the wall thickness.
- If the number of anchor rods is more than 2, spread out at intervals of up to 1 meter.
- The main walls were not the cause of deformation and cracks.
The support can be either reinforced (under the outer wall) or throughout the rest of the foundation. In this case, the reinforcement is driven into the foundation of the main building underneath.
The most commonly described types of deformation occur in booths made of marl and targets laid on clay. However, at the beginning stage of deformation (appearance of small cracks), it is recommended to seal the preventive screed on the heel frames. Remember that any metal that passes through the wall to the location will be exposed to cold and will have a negative impact on the wall, as it cannot be insulated with heat.
Vitaly Dolbinov, rmnt.ru
Vasil Mironovich, Voronezh, set up catering:
Good afternoon! My dads recently bought a small plot of land with a whole little booth on it. Approximately 2 months after purchase, a large crack was discovered on the back side of the booth. Friends suggested that it is possible to remove cracks in the walls. Can you kindly show me how to remove the walls of a purposeful booth?
The expert confirms:

Very often, owners of private buildings, especially large ones, are faced with the problem of cracks appearing on the walls. This occurs through shrinkage of the foundation, deformation of the soil structure, strong flow of groundwater or improper operation.
The method of repairing the wall depends on the reason that led to the appearance of cracks. It is most difficult and important to repair the defect, which is the result of the inheritance of an unclear installation of the foundation. In this case, in addition to repairing the wall, it is necessary to carry out work to eliminate defects in the foundation and then proceed until the cracks are removed. Otherwise, if you need to repair the foundation, all other robots will be of a careless nature.
Most often, cracks in the walls of the booth appear above the door openings or windows. If the stench is small, they can be filled with a special rare fraction. Work hard so that it fills all the empty space. If this method does not work, you will need to install window and door jumpers.
In this case, if such approaches did not help, you need to think about it, like removing the wall of a goal booth. So come in and get ready to remove the great cracks. To eliminate the vertical gap, the openings should be drilled through, and then metal fasteners will be inserted. They are fastened with steel beams, which are fastened with special pins. If the damage to the masonry is significant, the wall opening will be removed and re-laid.
If the defect is to be rotated in a horizontal position, in order to correctly insert the defect, it is necessary to quickly press the plates against the metal. For such plates, it is necessary to establish a gap in such a way that the seam is seamless. This allows us to reliably strengthen the structure of the booth. It is necessary to work carefully, as such horizontal movements can lead to the wall being completely displaced.
If the plots are damaged, both horizontally and vertically, they need to be quickly fixed with steel staples. For this fastening, openings are made in the wall. And the remaining fastening is covered with slimy smudges.
When repairing the masonry, keep in mind those in which a crack will soon be detected, this way it can be eliminated more effectively. This is due to the fact that it is taller than the one without sight, and the larger size it becomes. This will lead to the point where the booth will be impossible to repair and will completely break down.
Concrete is highly visible to the surface, but it cannot be damaged on its own. To ensure the safety of non-bearing buildings, reinforcement for the foundation is laid with a ladle hand. Mostly, there is a need for string and slab structures. In fires and joints, metal is laid more for constructive purposes than for real needs.
Armor rules
The reinforcement of the string foundation and anything else is consistent with the current rules:
- for working fittings, vikorysts must be of class no lower than A400;
- It is not recommended to use welding to join the strings, as the splinters will weaken the crosspiece;
- It is necessary to bind the metal frame with the reinforcement on the corners; welding is not allowed here;
- Smooth reinforcement is not recommended for clamps;
- it is necessary to carefully add a dry layer to the concrete, which is usually 4 cm, in order to protect the metal from corrosion (Yirzhi);
- when preparing frames, the rods are then directly connected with an overlap, which is equal to no less than 20 rod diameters and no less than 25 cm;
- When the metal is frequently washed, it is important to control the size of the aggregate in the concrete: it is not your fault that it gets stuck between the rods.
at the stitch foundation
Properly preparing the reinforcement cage is half the success. The foundation itself is being undermined by a variety of uneven deformations, which create vandalism. Varto report on the power supply from the butt of the stitch foundation with your own hands.
What kind of reinforcement is needed for the structure
The reinforcement of the strichkov foundation conveys the presence of three corpses of strizhnov:
- workers who lay their stitches on top of each other;
- crosswise horizontal;
- crosswise vertical.
The transverse reinforcement under the strech foundation is called stirrups. Its main purpose is to connect the working rods as a single unit. The reinforcement of a strech foundation is subject to compliance with regulatory documents. What kind of reinforcement is needed for a foundation? To give an accurate date, you will need to assemble folding frames.

To avoid hiring fakivts, you can get by with a simpler option. The technology of reinforcement of a string foundation under a small booth allows for structural overcutting. This is due to the fact that the stitch accepts very small pressures and puts pressure on the pressure.

To create a reinforcing frame, use vicor structurally so that the minimum permissible dimensions of the cuts are:
- For working reinforcement – 0.1% in the area across the foundation under the booths. Whenever the stitching side is set to 3 meters or less, the minimum acceptable value is 10 mm. If the side is more than 3 m deep, then the diameter of the working reinforcement cannot be less than 12 mm. It is not allowed to twist rods with girders larger than 40 mm.
- Horizontal clamps cannot be less than one quarter of the diameter. The design dimensions are 6 mm.
- The diameter of the vertical reinforcement is equal to the height of the stitch for the foundation of the booth. For slightly buried ones, the size of which is 80 cm or less, rods with a diameter of 6 mm are suitable.
The rules for reinforcement of a string foundation of a buried type are transferred to a vikoristan string of 8 mm or more.
 Scheme of typical re-cuts of reinforcement strips
 If there will be a booth from the target, then lay out the reinforcement with a small margin. This option will ensure the reliability of the design.
Knitting reinforcement
The reinforcement scheme for the strech foundation involves the connection of the strechs with a connection path. The knitting frame is of greater value in the original and welded ones. This is due to the fact that the popularity of metal burning is moving forward. Also, the rule is not to skimp on the elements of factory production. With a simple tool, you can connect the details without wasting any real value.
 Mіstya knitting reinforcement
 Increased strength is allowed when reinforcing the foundation on straight sections using the welding method. Ale armuvati kuti can only be done for additional assistance in knitting. These sections of the structure are the most reliable, so there is no need to rush.
Before knitting reinforcement for a stitch foundation, you need to prepare materials and tools. There are two ways in which metal connections are made:
- special hook;
- knitting machine (gun).
The first option is available, but it is also suitable for minor obligations. Laying the reinforcement around the foundation will take quite an hour. To connect the flames, the diameter should be 0.8-1.4 mm. Reproduction of other materials is not permitted.
Scheme of knitting reinforcement for a stitch foundation
To enjoy your day, you need to show patience and respect. It is not good to save time and money, otherwise it may cause problems during use. Connecting the rods after a dozen problems are not to blame. In this case, the process of finishing is simple; it is important to maintain the minimum amount of overlap.

How to properly knit reinforcement for a stitch foundation from the corners? There are two types of joint connections: between two perpendicular structures and at the junction of one wall to the other.
There are many options available due to the technology of Vikonannya. For heap walls the following are used:
- Zhorstke paw. For vykonanny it is necessary to cut a “paw” under a straight cut at the end of the skin shear. And here the rod resembles a poker. The length of the paw should become at least 35 diameters, shorter or larger. The bent part of the shearing is brought to a straight perpendicular section. In this way, the outer frame rods of one wall are connected to the other walls, and the inner ones are welded to the outer ones.
- Made from stiffened clamps of an L-like shape. The operating principle is similar to the first option. In this case, do not prepare a foot, but take a similar element, the side of which is at least 50 diameters of the working reinforcement. Tie one side to the frame of one wall, and the other to the frame perpendicular to the frame. In this case, the internal strings need to be united from the external ones. The length of the clamps may become three quarters of the height of the basement wall.
- Made from stiffened U-shaped clamps. This requires two elements, two sides of which equal 50 reinforcement diameters. The skins of their clamps are welded to two parallel rods and one perpendicular rod.


How to properly reinforce a strip foundation on blunt corners. For this purpose, bend the external haircut to the required degree value and attach it to a new level of strength. Internal elements are linked to the external.
 Scheme of correct and incorrect armoring of stupid kutі
 To place the reinforcement where one wall meets the other, paint using approximately the same methods as at the front end:
- nahlostuvannya;
- G-like clamps;
- P-like clamps.
The size of overlaps and joints is taken to be equal to 50 diameters. When victorious, the memory of the most extensive benefits works:
- connection under a straight cut;
- continuity of connection between external and internal elements;
- The later rods are connected with a viscous intersection.

It’s not good to repeat these benevolences at the hour of waking up.
Vikoristannya v'yazalny gachka
Before you reinforce a strech foundation, be sure to learn how to use a working tool. A special gun is rarely used for private housekeeping, so ownership will require additional expenses. It is advisable to invest in the tool only for the conclusion of a transaction, and not for the purpose of setting up one day.
For these reasons, the most extensive tool for knitting in private households has become a hook. It will be easier to use it if you prepare special templates ahead of time. Such a part acts as a workbench and is very light on the work. On the right there is a swish. To prepare a template, you need wooden blocks, the width of which should be about 30-50 cm, and the length cannot be more than 3 m, the fragments of such a workbench are difficult to assemble.
 The most extensive way of knitting is with gachkom
 For a wooden structure, it is necessary to drill slots and open them in order to repeat the outline of the struts in the frame. At such an opening, lay out the knitting fabrics at the back, 20 cm deep, and then fix the reinforcement rods.
To understand the knitting technology, you can look at the buttstock. When working, two options are required: for crossover (if the elements are moved perpendicular to each other) and for overlap. Stitched foundations most often require another technology; with a slab structure, the first one will be most relevant.

To connect the frame positions together with an overlap, proceed in this order:
- The connection is made in several places after the end of the stick, the place is determined so that it is located in the sunken part of the reinforcement profile;
- It is necessary to fold it all over and place it under the joint;
- for help, tighten the loop;
- bring the long end to the instrument and place it on it with a small bend;
- they begin to wrap the hook, twist it;
- Remove the tool carefully.
 For one half overlap, repeat the procedure 3-5 times. It is not enough to combine elements at a time to avoid over-mixing. Knitting reinforcement under a string foundation at which point will be unreliable, since fixation at one point does not protect the integrity of the elements.
Properly connecting the frame will guarantee the reliability, durability and durability of the supporting part.