How to make a tulip from corrugation paper. Bouquet of tulips from candies with their own hands. Master Class
Want to give mom a bouquet of flowers that never started? Then try to make it from corrugated paper. Beautiful tulips you get to make in a short time, thanks to the step-by-step instructions with photos from this article. You can create real masterpieces from the simplest materials with your own hands.
Master class: how to make tulips from corrugated paper
In order for you to have beautiful flowers with your own hands, the maximum similar to the real, you will need to prepare the following materials:
- corrugated paper
- scissors
- wire

It is advisable to prepare a petal pattern in advance to cut smooth blanks. Attach it to the resulting square and cut out. After you managed to make a lot of petals immediately, it will be necessary to fold each of them separately, slightly twist at the bottom.
Most of the petal is needed slightly to generate a beautiful bud. Corrugated paper is well stretched, so do not be afraid to pull it.
To make the tulip bud you will need 8 petals, which will have to neatly fold and combine each other.
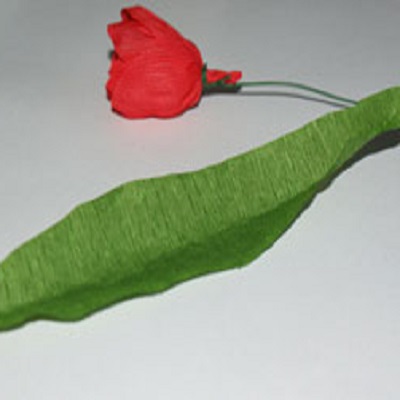
Secure the bout on the wire, which then wrap the floral green ribbon to imitate the stem. Separately from the corrugated green paper cut the leaf, which with the help of the wire, attach to the stalk.

Tulips from paper You can also make another method - twisting strips. To do this, you do not need to cut every petal separately. It is enough to cut the paper on the strips, twist them in the central part. Then fold in half and trim the edges so that they become semi-circular.
Then it will be necessary to give everyone equal to each petal convex shape And make a bud of them. Stem, as in the previous embodiment, is performed from wire and tape tape.
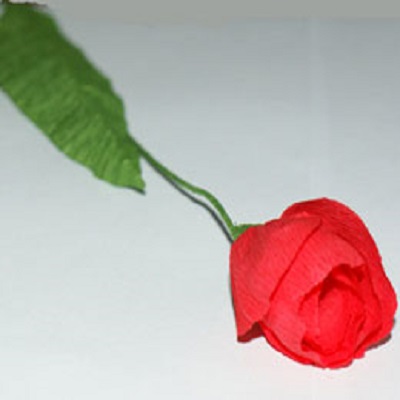
Tulips made from corrugated paperThey look more natural, so you can use them to form a bouquet for a gift to your mother or grandmother, as well as for interior decor.
Today we will tell you two options for creating bouquets from tulips.
Both master class is not quite complex, but proven and spectacular. Such bouquets will be able to rejoice close and relatives for a very long time. So, proceed:
Option number 1. How to make tulips from corrugated paper.
In the first master class, we will look at how to create a fairly simple bouquet of tulips.
To make tulips from corrugated paper will be required:
- Red corrugated paper for bud (or you can choose any other color or make a bouquet of multi-colored);
- Green corrugated paper for stalk and leaves;
- Wire;
- Adhesive gun for needlework (one rod);
- Scissors.
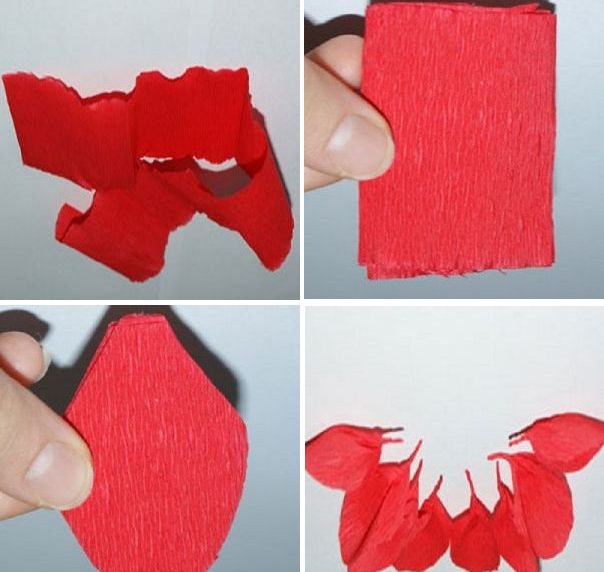
1.
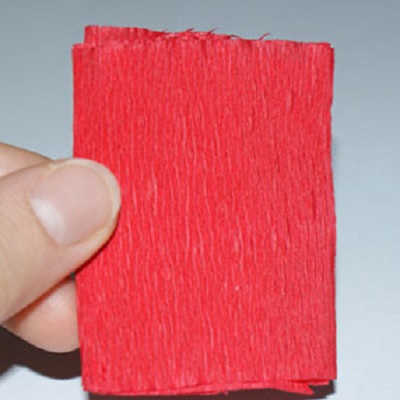
Take corrugated colored paper And cut off the rectangular strip, approximate size 5 to 26 centimeters. 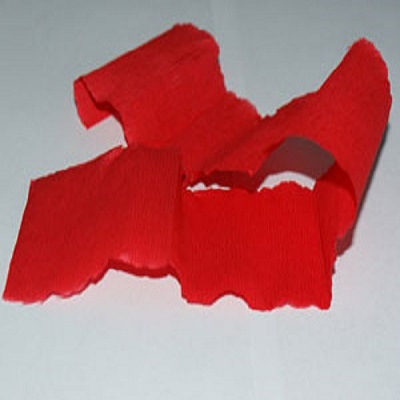
2. The strip that we turned out, we turn carefully in half, stroke with our own hands, then once again in half - we should have a rectangle 5 to 7 centimeters.
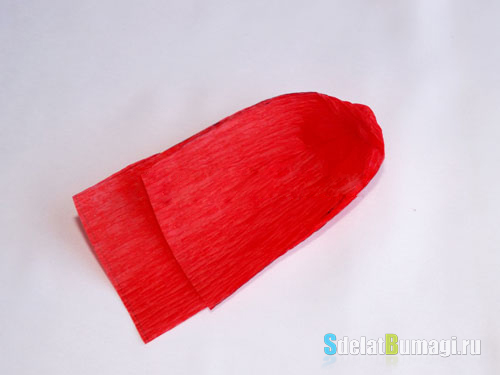
3. From the received rectangle, we cut out the shape of the petal, draw the shape in advance and cut the contour. At the bottom of the petal should turn out two corner for fastening (looking in the photo).

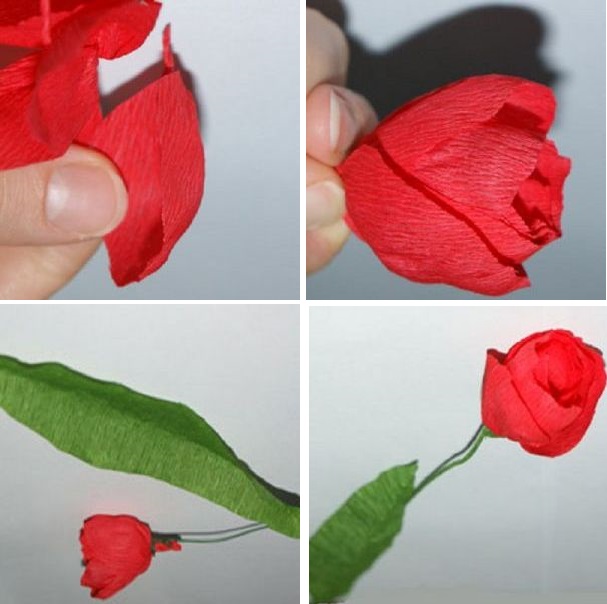
4. Now, spread the petals separately, and each we twist the tip with corners.
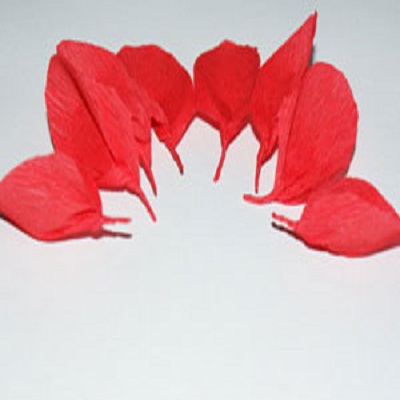
5. Then give the realistic form of petals. To do this, stretch your fingers the edge of the petals. We do it very carefully and give them the forms of the cup, as in the photo.
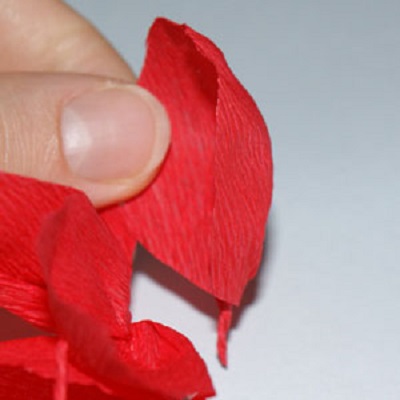
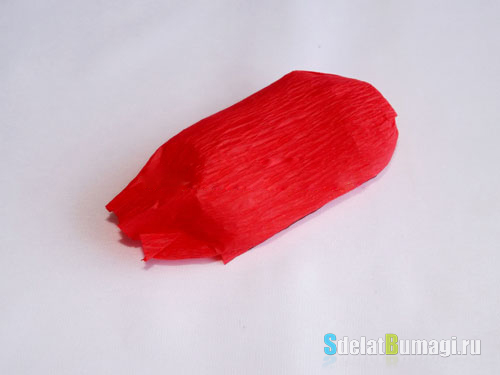
6. Arriving in a circle, concave side up, we begin to form a tulip bud himself. Holding the petals for the bottom where we have twisted, fix with a glue gun for needlework.
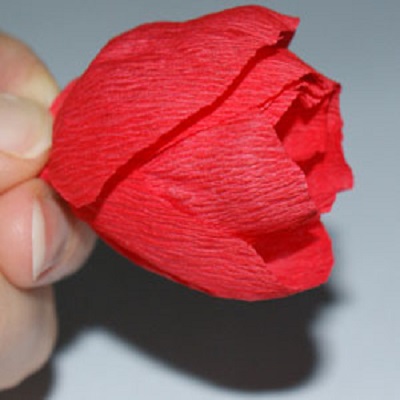
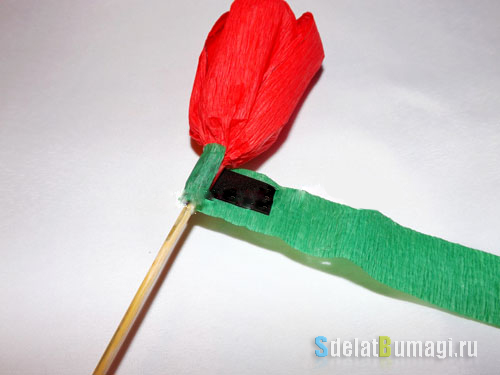
7. Now we will do a tulip stem. Take the wire and attach a bud by the end of the wire.
8. Then take green corrugated paper again, cut off the strip of 1 - 2 centimeters width and leaflers for the stem. Next, carefully and carefully from the base of the bud, wrap your own wire to the middle. At the end of the stem, we are lining with a glue gun. Then we take a piece of leaf, in the middle we will turn it and glue to the stalk.
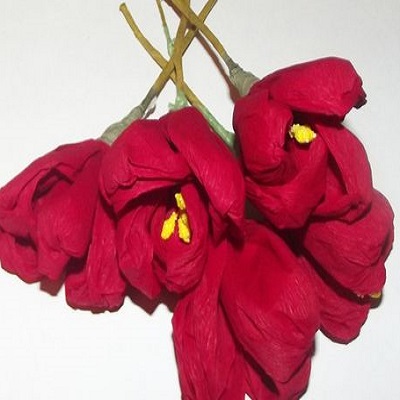
In the middle of each tulip, you can make stamens: take a thin wire, to wind the yellow corrugated paper and fasten in the center of each flower. Looks like a photo.

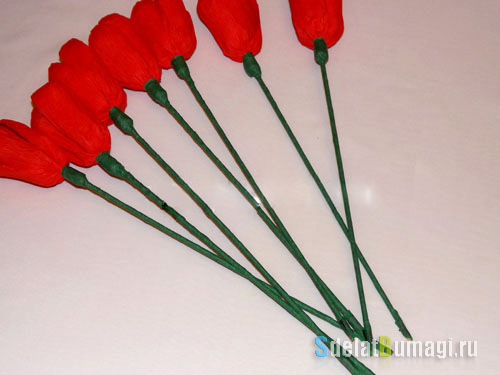
9. Congratulations! Your excellent bunch is ready! Thanks for attention! Greet your relatives and close to gentle and cute bouquets created by your own hands. Such gifts are especially pleasant!
If there are difficulties or questions about the creation of flower. You can familiarize yourself with the algorithm master class on video. Which is presented below.
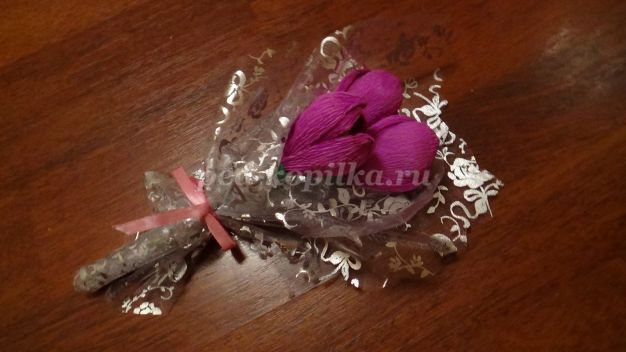
Option number 2. Tasty bouquet of tulips with candies.
The second master class is to create a wonderful bouquet of tulips with a tasty surprise in every flower!
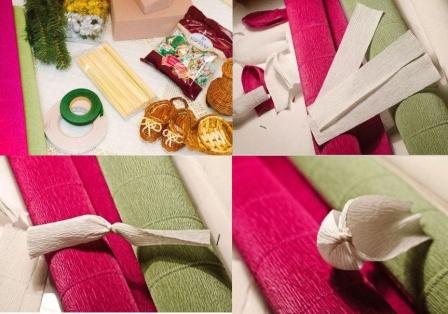
For this master class, how to make tulips from corrugated paper, with a surprise, you will need the following materials (alleged number of tulips - 9 pieces): 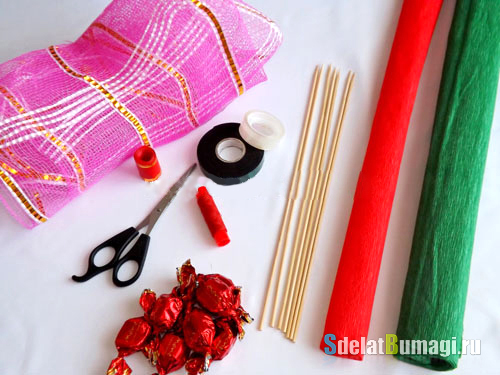
- 9 candies (preferably chocolate);
- corrugated paper (your choice is any color suitable for tulips and combined with packing candies: pink, yellow, red, white, etc.);
- corrugated paper for stalk and leaves (green);
- scotch transparent;
- pistol glue for needlework (one rod);
- 9 pieces - wooden sticks (long spanks);
- special paper and tapes that are used to design bouquets florists (Color It is necessary to pick up a contrasting tulip booton);
- scissors.
1.
For the beginning, take candy and wooden sticks. We curse with the help of a tape candy to the spanks. I fix the candy with scotchball - carefully and gently wrapped at the base of the phantha and sticks. We look at the photo. 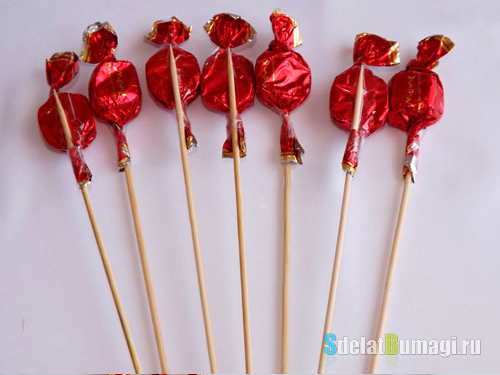
2
.
Now we take corrugated paper (color) and cut off 24 rectangles, size 6 to 17 centimeters. For one tulip, three rectangles will be involved - petal. 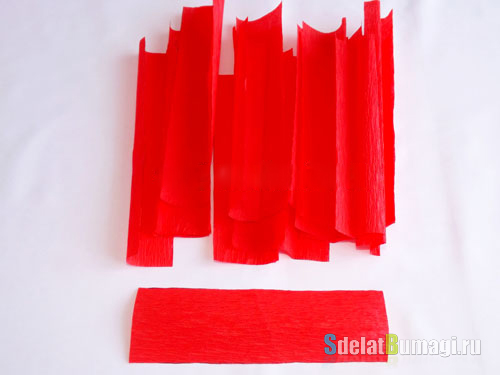
3 . In turn, all rectangles will lay down so that we have from one side of the tail in one centimeter.
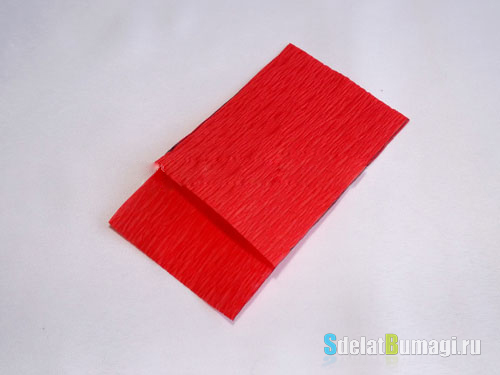
4 . Then each petal we fold, like a fantasty in the seal and put inwards the shorter part. We direct the flow of the petals. Let's look at the photo how it should happen.
5 . Take your fingers for the edges of the petal and still grow corrugated paper. Looks like petal, as in the photo.
6 . We carry out the same algorithm of actions with all the petals - we have 24 pieces.
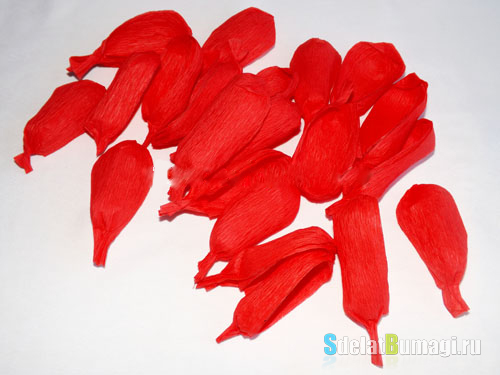
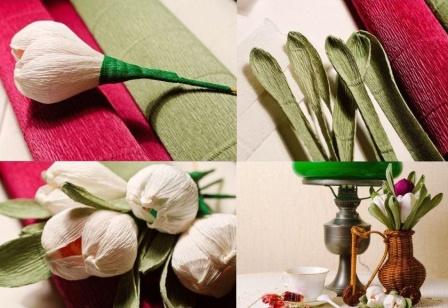
7 . Now we go to the creation of bouquet of bouquet of tulips. Each of the 9 buds need three pets. In a circle to the candy, we attach and fix with the help of tape for three pets.

8 . Then go to the creation of sheets for tulips. We take corrugated green paper and apply 18 rectangles 4 to 26 centimeters. For each tulip, two sheets.
9 . Rectangles are folded in turn in half.
10. And by analogy with P.№4, we turn on the fantasy on bend as a fantasty and slightly spread the corrugation. We look at the photo.
11. We should have 18 leaves.
12. Corrugated green paper for all roll length cut strips - the width of about 1.5 centimeters. With these stripes, we wrap the stalks of tulips.

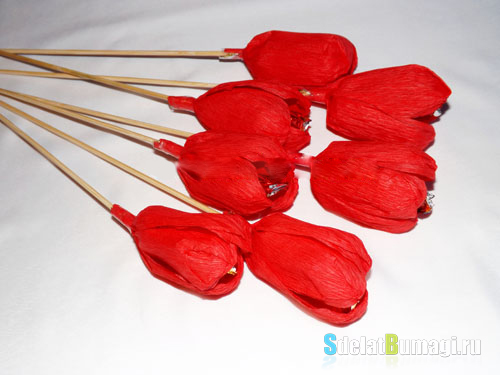
13. We take a glue gun for needlework and on the base of the tulip bud neatly apply a few drops. Tightly press the edge of the green stripes and begin to wrap the stem. At the end of the skewers we apply a couple more drops of glue and fasten the end of the stem.
14. By analogy, the same actions need to be held with all the flowers to make tulips from beautiful corrugated paper.
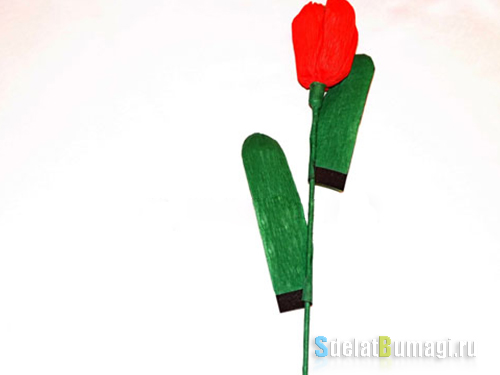
15. To complete the creation of tulip, we need to attach two sheets on tulip, which we prepared from green corrugated paper. We drip on the stalks with an adhesive gun twice at different flower distance. Wrapped with leaves, fix on the stalk.
16. Congratulations! You created a sweet and magnificent bouquet of tulips with a surprise!

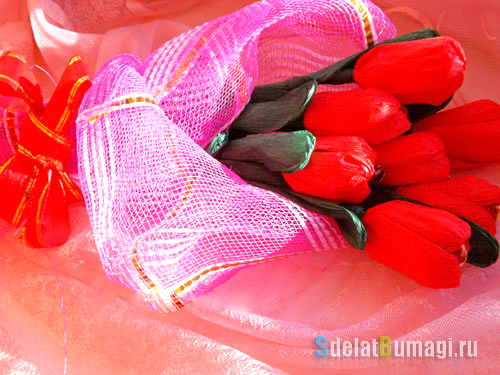
17. For the greatest effect from the gift, it is beautiful to place our bouquet of tulips. Feel like florists and certify the tulips in felt, in an artificial or jute mesh or sisal.

18. The resulting bouquet is bandaged. Forming a large bow, silk or other tape for design, which you prepared in advance.
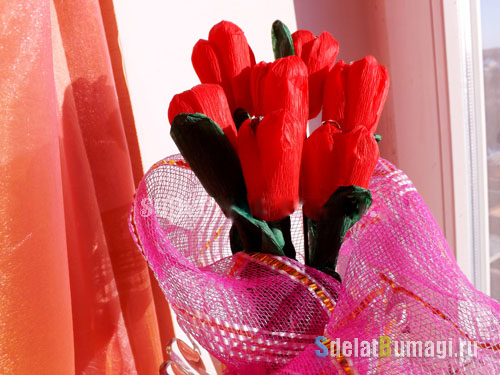
Your bouquet - a gift is now only waiting for a solemn presentation to the lady for which we tried so much!
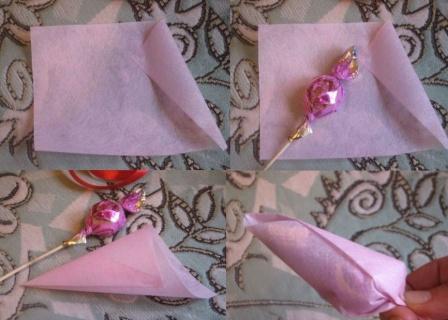
Making crafts from sweets can be called real art, because ordinary sweets can turn into floral masterpieces within a few minutes. Candies that are covered with fabric or corrugated paper from above are the flower buds. In this article you will learn how to make tulips from candies do it yourself. Such unusual bouquets will decorate the interior for a long time and never started.
Corrugated paper tulips and candies
In order to make a gentle bouquet of tulips you need corrugated paper, truffle, tape tape, bamboo sticks, teep tape, flowers vase.
![]()
Separately make leaves from corrugated paper. For this, the corrugated paper should be cut into strips with a length of 20 cm by 3 cm. The leaves are combined with flowers and the finished composition is inserted into the vase.
Tulips do it yourself from felt and candy
You can make your hands beautiful tulips using felt and candy. To do this, you will need very thin sheets of felt, candy and bamboo sticks.
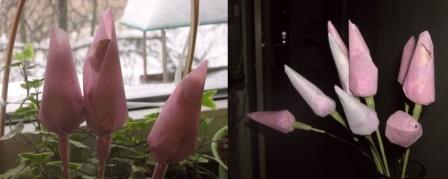
Now you can give expensive people at any time of the year. Bouquet of tulipsMade with your own hands.
Sweet design. Bouquet of candy tulips. Step-by-step instruction with photo
Basket of sweet tulips. Master class with step-by-step photos
Tsvetkova Maria Aleksandrovna, Educator, MDOU kindergarten Combined View No. 193, Yaroslavl
Description: Master class is designed for children from 5 years (under the leadership of adult), teachers additional education, educators, parents and just creative people who love to experiment.
Purpose: Interior decoration, gift.
Purpose: Making crafts (gift) with your own hands.
Tasks:
1. To make a desire to make a beautiful thing with your own hands;
2. Ride the shallow motility of the hands;
3. Wear creativity, imagination, fantasy;
4. Ride composite skills and aesthetic feelings;
5. Award the desire to make a pleasant family and relatives.
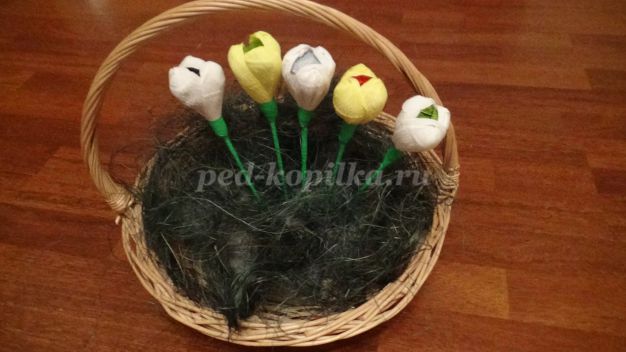
FINALLY SPRING! My favorite season. In addition to joy, I am a lot of worries. It so happened that most of my friends and familiar birthday is in the spring, and even soon March 8. We, women, each other, love to congratulate. This year on March 2, my mom is an anniversary (55 years old). Everything was granted while I thought that she was to give, and everyone acquaintances. Tired of the standard set - flowers, candy. And what if you combine? Bouquets of flowers are now at the peak of fashion. Even the name of this technique was invented - "Sweet-Design". Sweet-design (from the English. Sweet is sweet, Salty) is a compilation of confectionery compositions, in particular from candy. I decided why not try?! After all, a gift made by your own hands is much better "shop". And if you attract children to the manufacture of children, then this is already a "family conspiracy." Such work always unites and is very fun. I started with a simple bouquet (colleague at work taught).
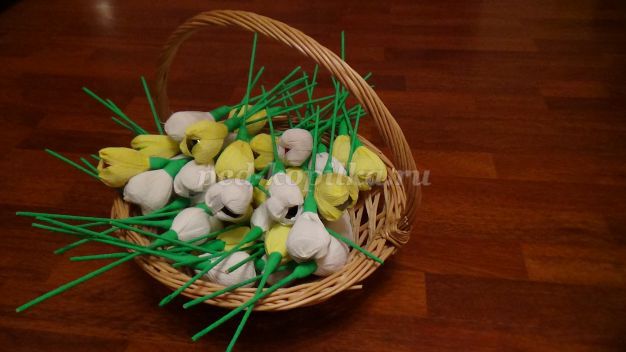
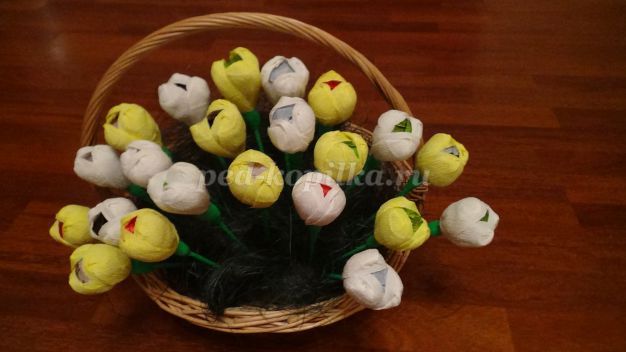
Then he decided to make the composition in the basket, now made bouquets all friends. Still, the more colors, the more interesting the composition looks. It is better to take from 35 or more colors. It will be more spectacular.
Say "thank you" in any way
And this is not a bit easy,
But to adequately thank
Candies of the most delicious hand!
*****
You love sweet dreams,
Give and get flowers.
I decided to fulfill me alone
Although not cherished, but still a dream.
I hurry to you with a box of sweets,
I hold a festive bouquet in your hands.
And I wish today and always -
Let the dreams are fulfilled, even sometimes!
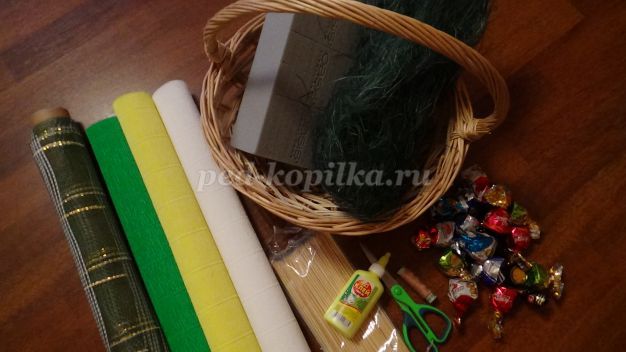
Materials and tools required for work:
- Candy (I have 55 of them)
- Corrugated Paper (White, Yellow, Green)
- Basket
- Floral Oasis (for dry flowers)
- scissors
- PVA glue
- Thicks
- Sizal ("Mexican" or "Silky" grass: Lubyan fiber, obtained from agave leaves and some other types of plants of Central America; It is used to highlight ropes and coarse fabrics)
- Wooden shockts for kebab
- You can take the mesh decorative, ribbons to decorate the basket (optional)
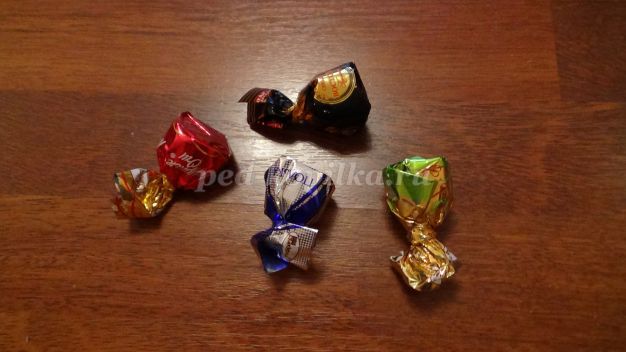
Immediately I note that candy needs to take only such a form, what I have in the photo (cone).
Step-by-step process of performance:
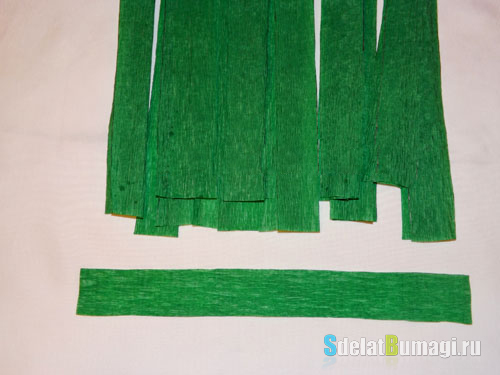
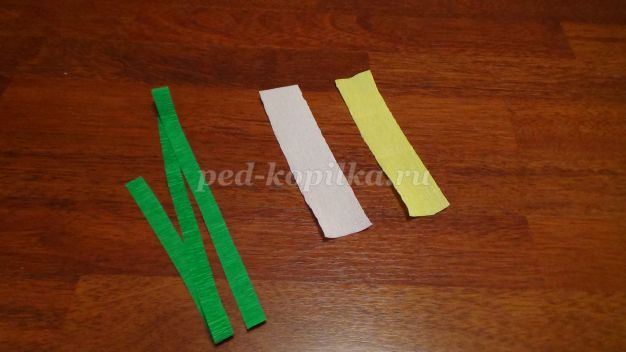
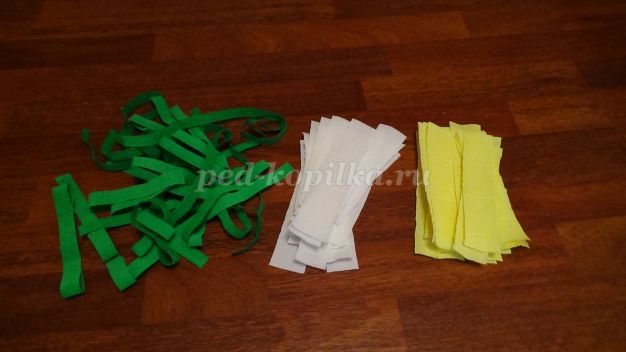
First prepare paper. White and yellow paper should be cut into strips in size somewhere 3 at 13cm or 4 per 14cm. These will be the petals of our tulips. Green paper - on thin long strips width in 1 cm. This is for stalks. Just important: white and yellow paper cut along the corrugations, and the green across (so that it can be stretched).
Strips need a lot. Three petals will go to each flower. I have 55 colors (27 yellow and 28 white), that is, 81 yellow strips and 84 strips of white.
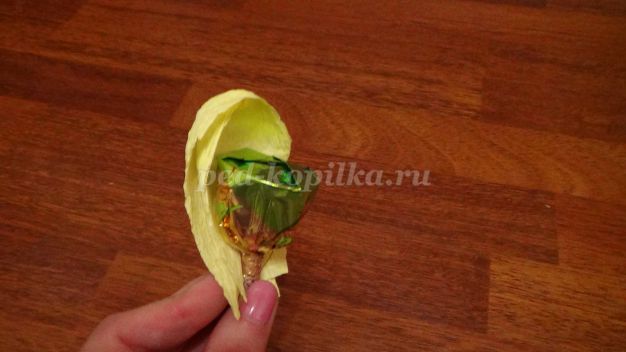
Next, we take the candy, insert a skeleton into it. We twist the fan around the skewers, watered thread, fix. I tried without a thread, but so hard keeps.
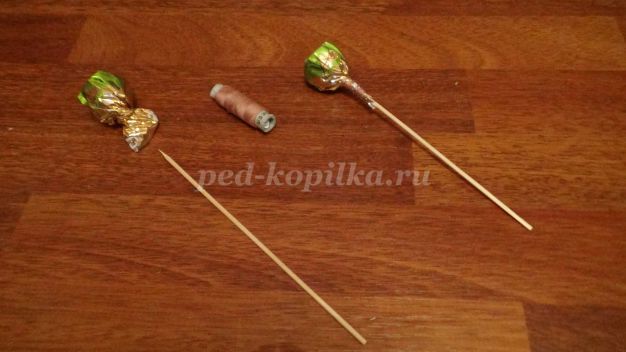
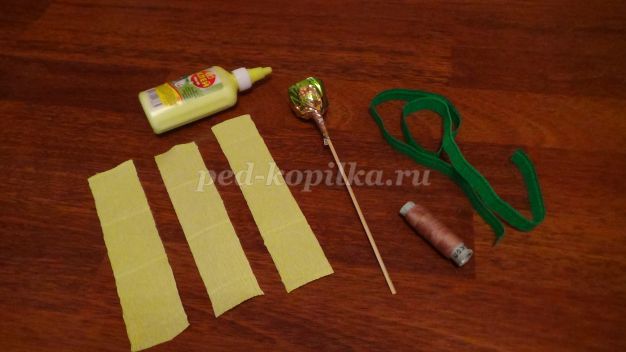
So, I repeat. For one tulip flower, we need: candy on a skewer, three strips of white or yellow corrugated paper, thread, strip of green paper, glue.
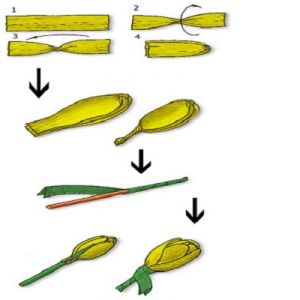
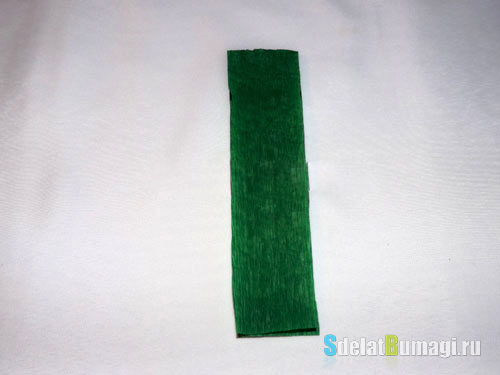
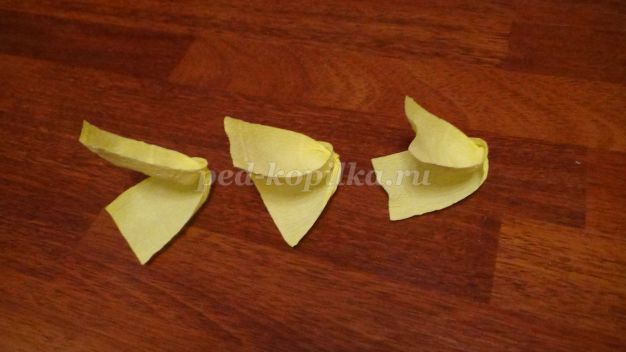
We take a strip of yellow, twist each of them in the middle. It turns out a "bow".
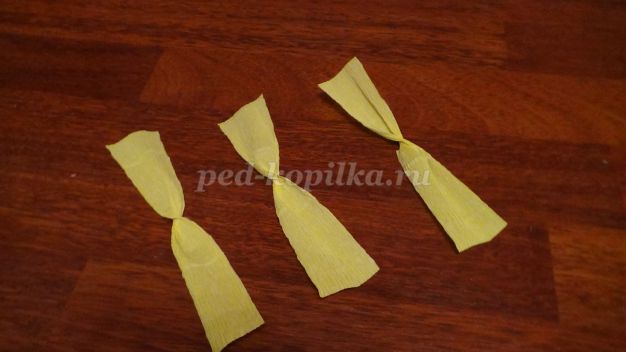
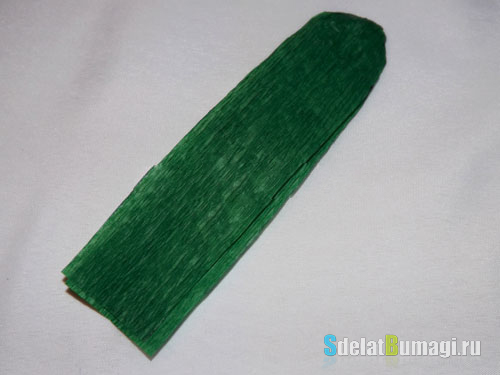
Then these "bows" fold in half and stretch a little in the width (the corrugation stretches perfectly).
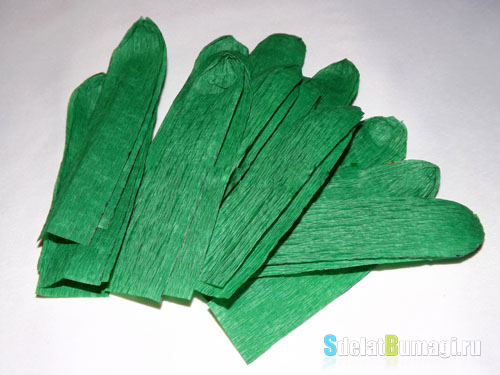
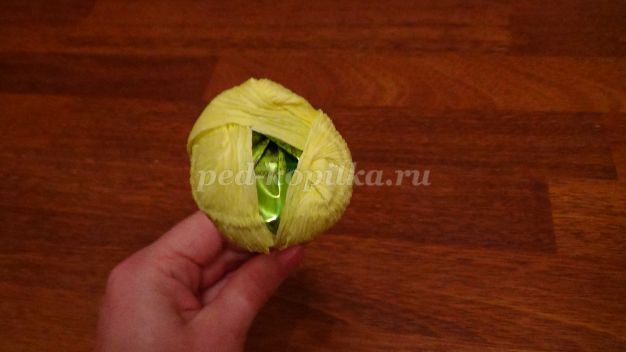
Now you need to make each of the petals to candy. And all together wrapped the thread.
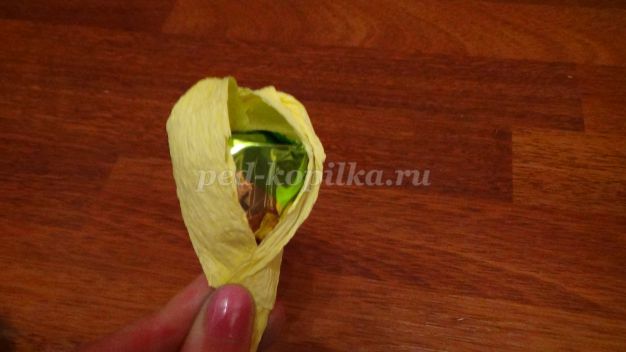
It turned out such a bud.
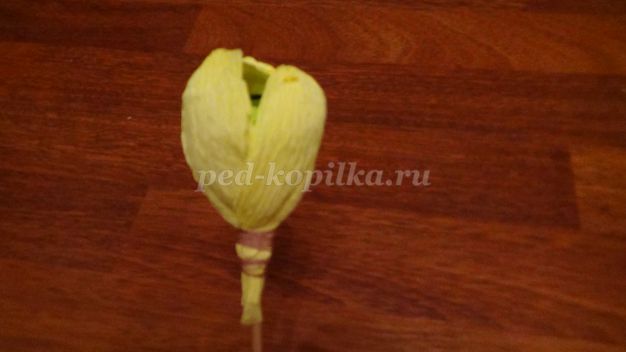
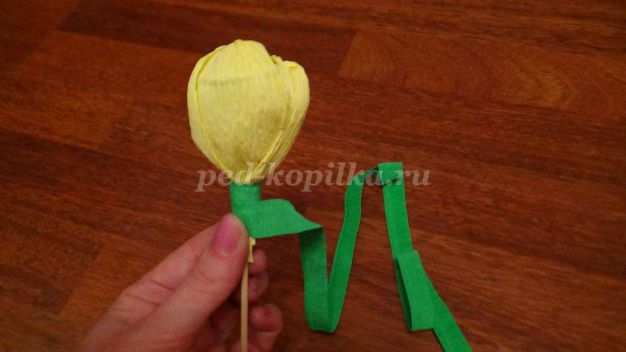
Then wrap the green strip the entire skeleton, ranging from the bud. The paper stretches well, as we absorbed the corrugation across.
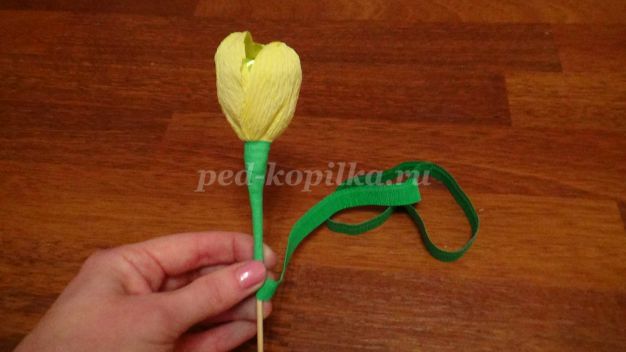
In the end, cut off excess paper and fix glue.
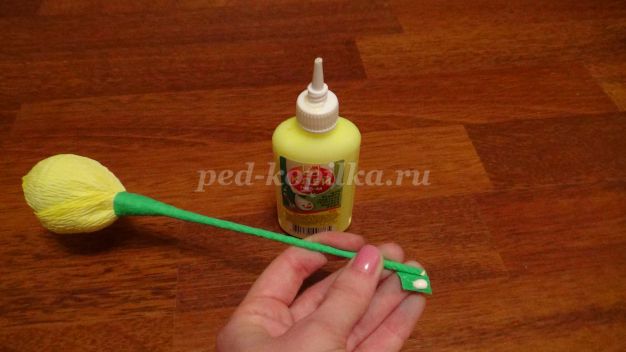
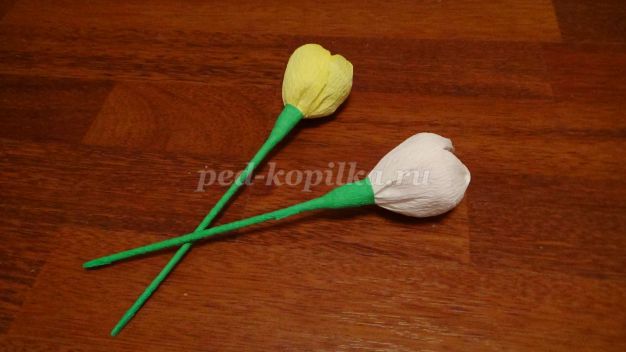
It turned out a yellow tulip. Also doing white.
For the manufacture of 55 tulips I left for about 4 hours. But for watching interesting films time passed unnoticed. If you work with the whole family, copier even faster. An even child preschooler will cope with a "bow" of petals or put on a skeleton of candy.
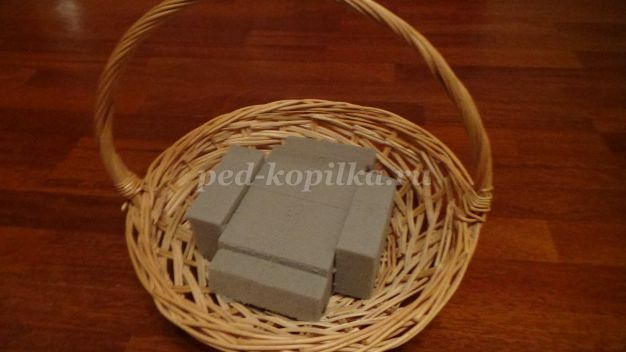
Once all tulips are ready, proceed to the design of the composition. In the basket put the floral oasis. It can be bought in the "All for Creativity". It is important to know that there are two types of oasis: for living and dry flowers. You can certainly use any, but if there is a choice, take an oasis for dry flowers, it goes less.
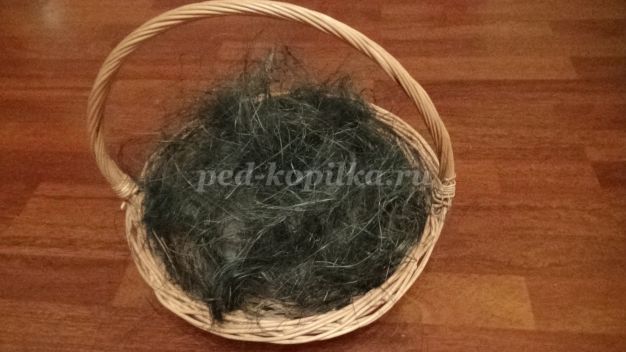
Then put the sisal. You can use sisal in a roll, decorative grid, burlap, even packaging paper. What do you want. The main thing is to close the oasis. I chose a green sisal beam (type of grass).
We start to insert one tulip, alternating white with yellow.
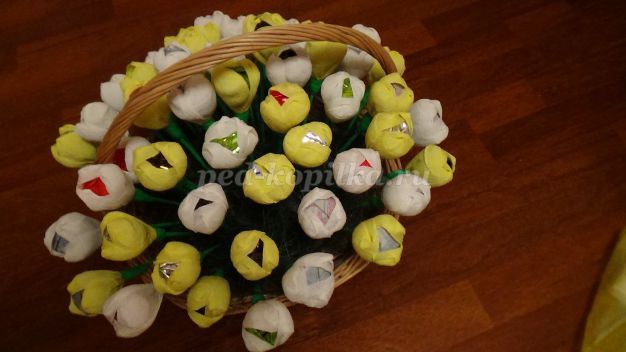
Cart can be decorated with ribbon and bow.


